Runtime Archimatix is available in version 1.0.5 -full documentation coming soon!
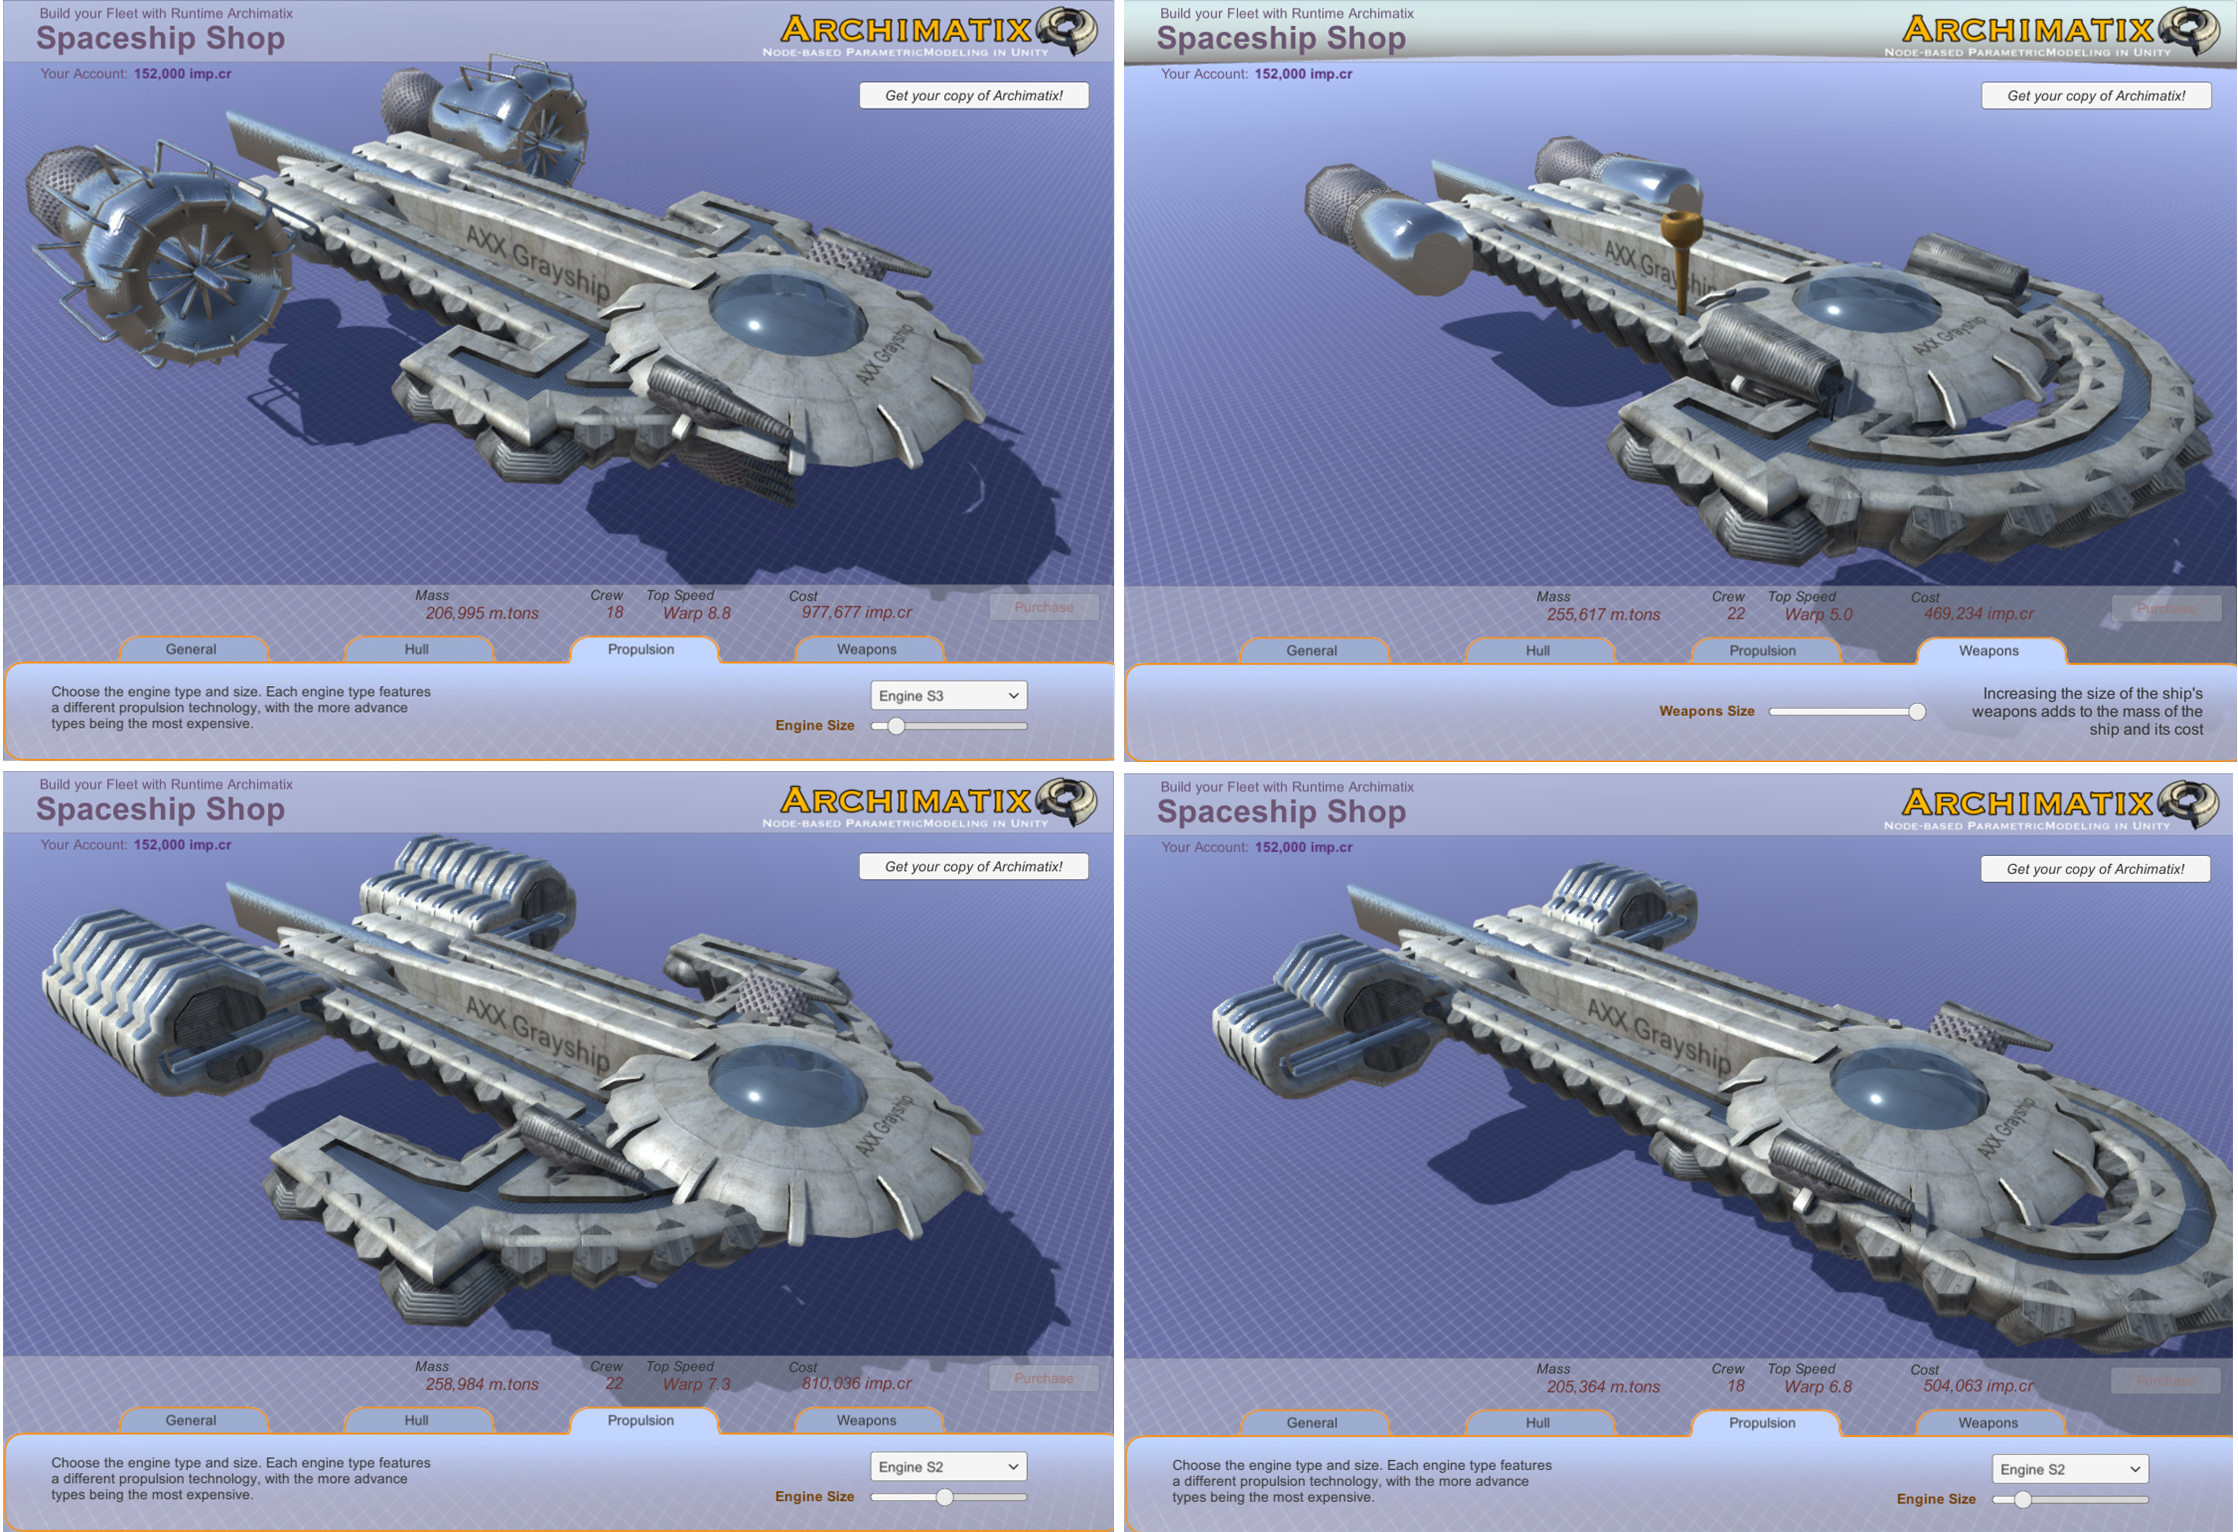
With Runtime Archimatix available only in Archimatix Pro, you can create in-game interactive modelers of your own design. A good example is the Spaceship Shop demo scene included in Archimatix Pro. In this demo, you can use the in-game UI to deliver simple modeling functionality, such as changing the shape of the hull with runtime handles, choosing the engine type and size, as well as sizing and positioning the weapons. Such a shop could be part of a game or its own independent application.
Other examples might include in-game house construction, maze design and, well, anything you can dream up! By creating such runtime applications, you not only make environment and prop building simple, fun and thematic, but also generate opportunities for in-app purchases that go beyond the acquisition of modular inventory items.
In its first iteration, runtime Archimatix (AX) allows you to control AX parameters from your runtime scripts. This means that you can connect your runtime UI to an AX model and control it in a way that works with your game design. For example, if your player can spend game dollars to build a house, then they can size the house interactively while watching the cost of the house vary with the floor area of the building.
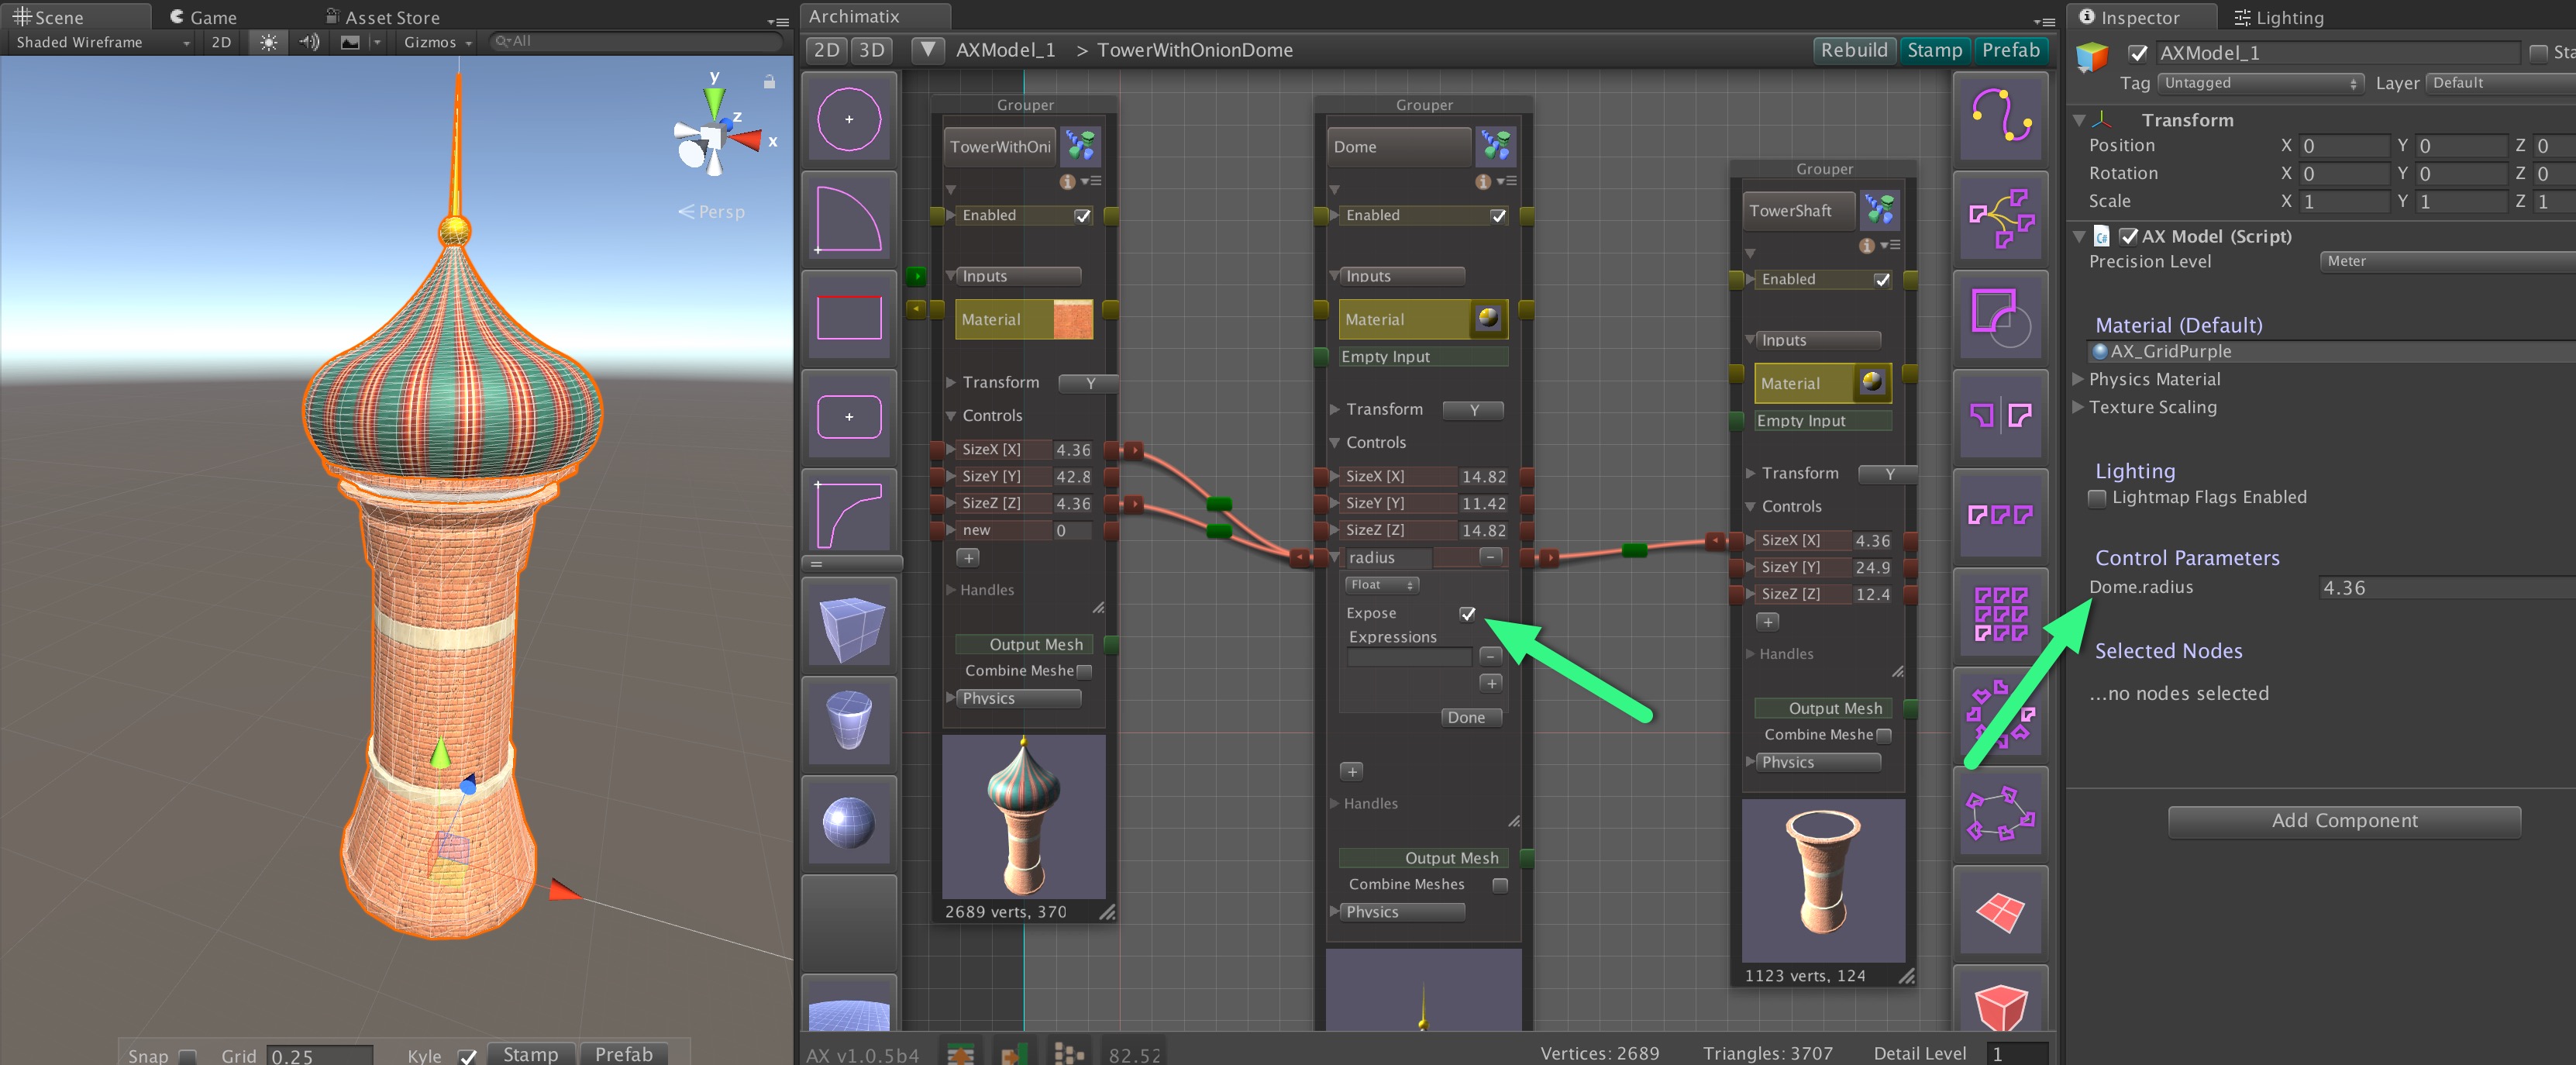
To facilitate this, AX has an “Expose” checkbox under each parameter in the node palette. Once you check that, the parameter will be displayed in the Inspector for the AXModel. With the variable exposed at the model level, your script can easily access the variable to get and set its value.
In order to modify these parameters in runtime, you need a reference to the AXModel (a Component of a GameObject in your scene). In your MonoBehavior, add a public member of type AXModel:
using AX;
public class GrayShipDesigner : MonoBehaviour {
public AXModel model;
}
After doing this, you can drag the AXModel aGameObject into the ObjectField in your runtime script. With this reference to the parametric model, you can get and set the parameters that you have promoted put to the model interface. When you set these parameters, they will ripple their value change throughout the graph based on the Relations you have established between parameters.
To make your code more readable, it may be good to set up references to the parameters so they are easier to get to:
using AX;

public class GrayShipDesigner : MonoBehaviour {

    public AXModel model;

    public AXParameter P_Radius;
    public AXParameter P_Channel;

}
In the Start function, you can establish these parameter references using the getParameter function. This function uses the name you have given the parameter in the graph to find the parameter:
 // Use this for initialization
 void Start () {

    // Establish refernces to AXModel parameters.

    if (model != null)
    {
        P_Channel = model.getParameter("Engine.Channel");
        P_Radius  = model.getParameter("Engine.radius");
    }
}
To modify the parameters you have a reference to, use AXParameter.intiateRipple_setFloatValueFromGUIChange(floats value) and then let the model know you are ready to have the changes regenerate the model while dragging with model.isAltered() or after UI edits are complete with model.autobuild().
 // Example of a UI callback function. This could be a delegate of a Slider that controls the radius.

 public void radiusSliderUpdate(float val)
 {
    // Set the value of the parameter and let this change ripple through the network of Relations

    P_Radius.initiatePARAMETER_Ripple_setFloatValueFromGUIChange(val);


    // Let the model know that you are done making your changes,
    // but not necessarily to create new game objects.
    // isAltered() is often called during a repetitive change such as with a slider.

    model.isAltered();

     // Other relevant game state changes not necessarily related to Archimatix

     radius = val;
     recalculate();
 }


 public void engineTypeDropdownUpdate()
 {
     // Set the value of the parameter and let this change ripple through the network of Relations

    P_Channel.initiatePARAMETER_Ripple_setFloatValueFromGUIChange(engineTypeDropdown.value);


    // Tell the model to rebuild its GameObjects.
    // autobuild() is often called after a Dropdown or Checkbox UI is modified.

    model.autobuild();

    // Other relevant game state changes not necessarily related to Archimatix

    recalculate();
 }
That’s all that you need to get started with runtime Archimatix! There will be full API published eventually as well as some example scenes.


Recent Comments