 If you’re artist who is not that into coding (just yet!), but you still want to create Archimatix Pro (AX) runtime behaviors, well, you can in version 1.0.6 and later!
While Archimatix parameters can be exposed to the interface of your model, allowing easy access to them via custom game scripts, you may also use Unity’s built-in UI system or assets like PlayMaker to control the values of AX parameters with the help of an easy to create runtime controller.
Let’s jump right into a short example to show rather than tell! While you can control any manner of complex and sublime models you have created in AX using runtime parameters, in this example, we will keep it simple and just adjust the height of a Box at runtime using a UI Slider. For this example, we won’t eve use the Node Graph Editor.
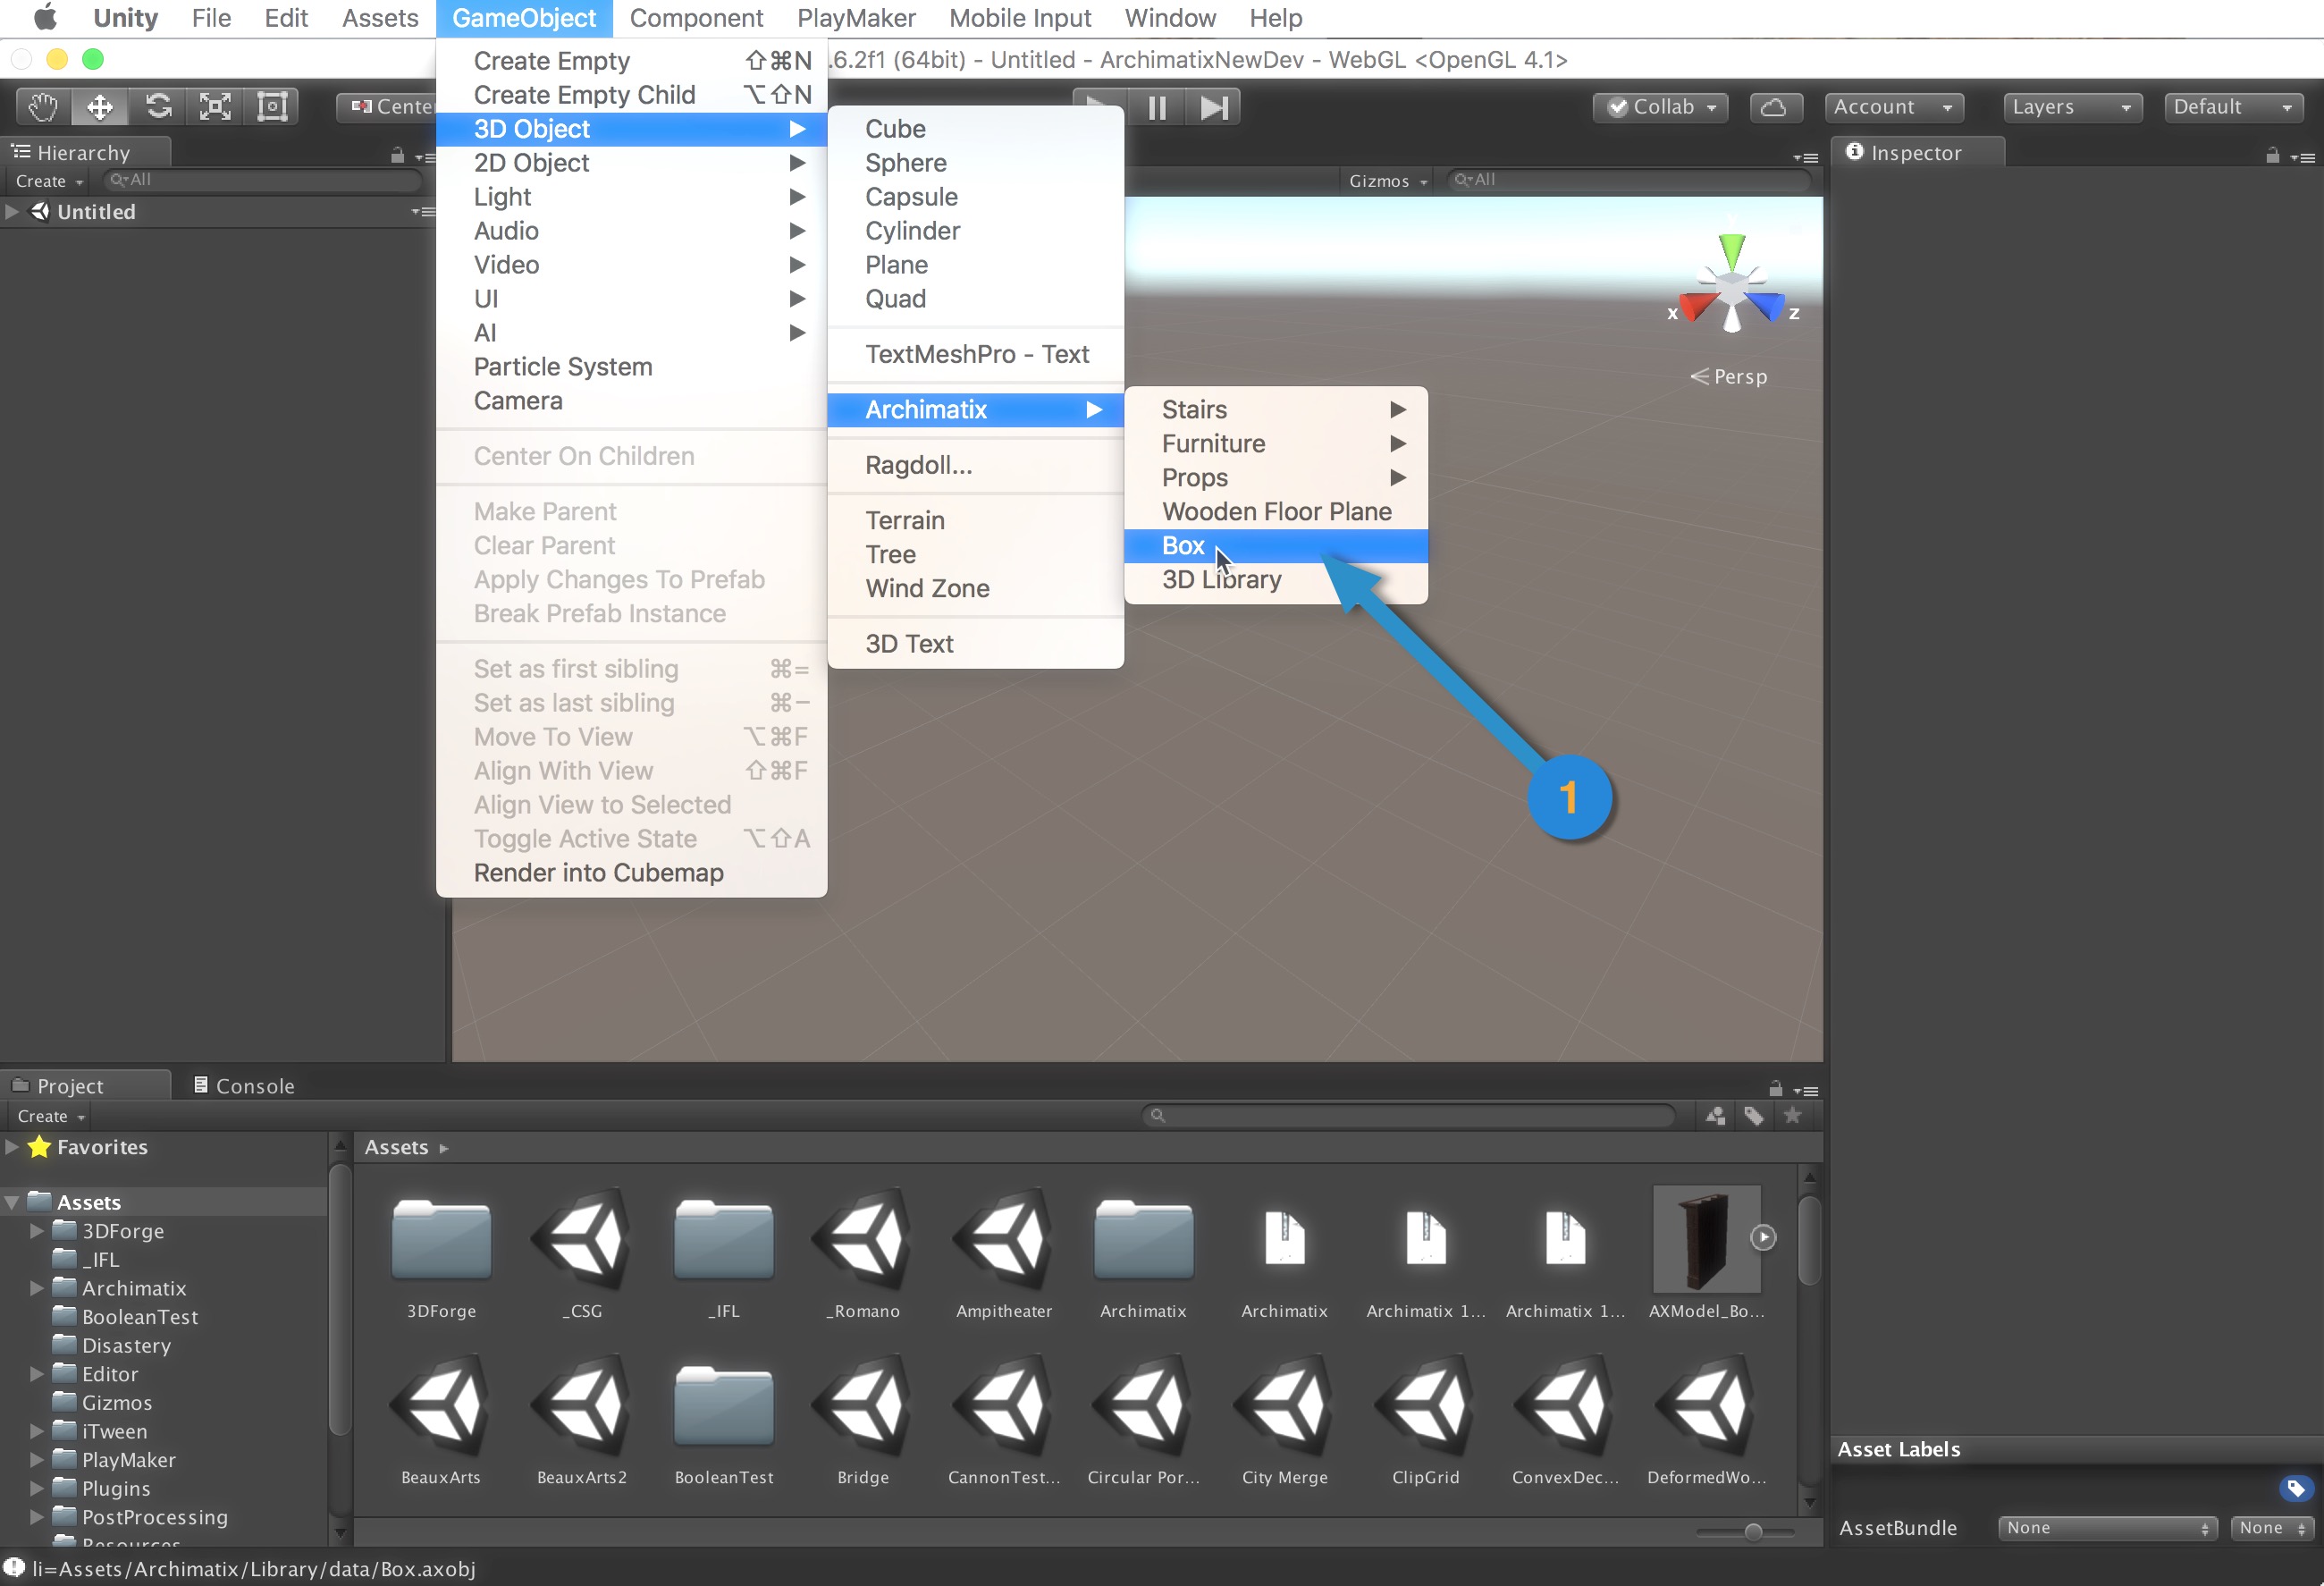
Step 1. From the Unity menus, create an Archimatix Box.
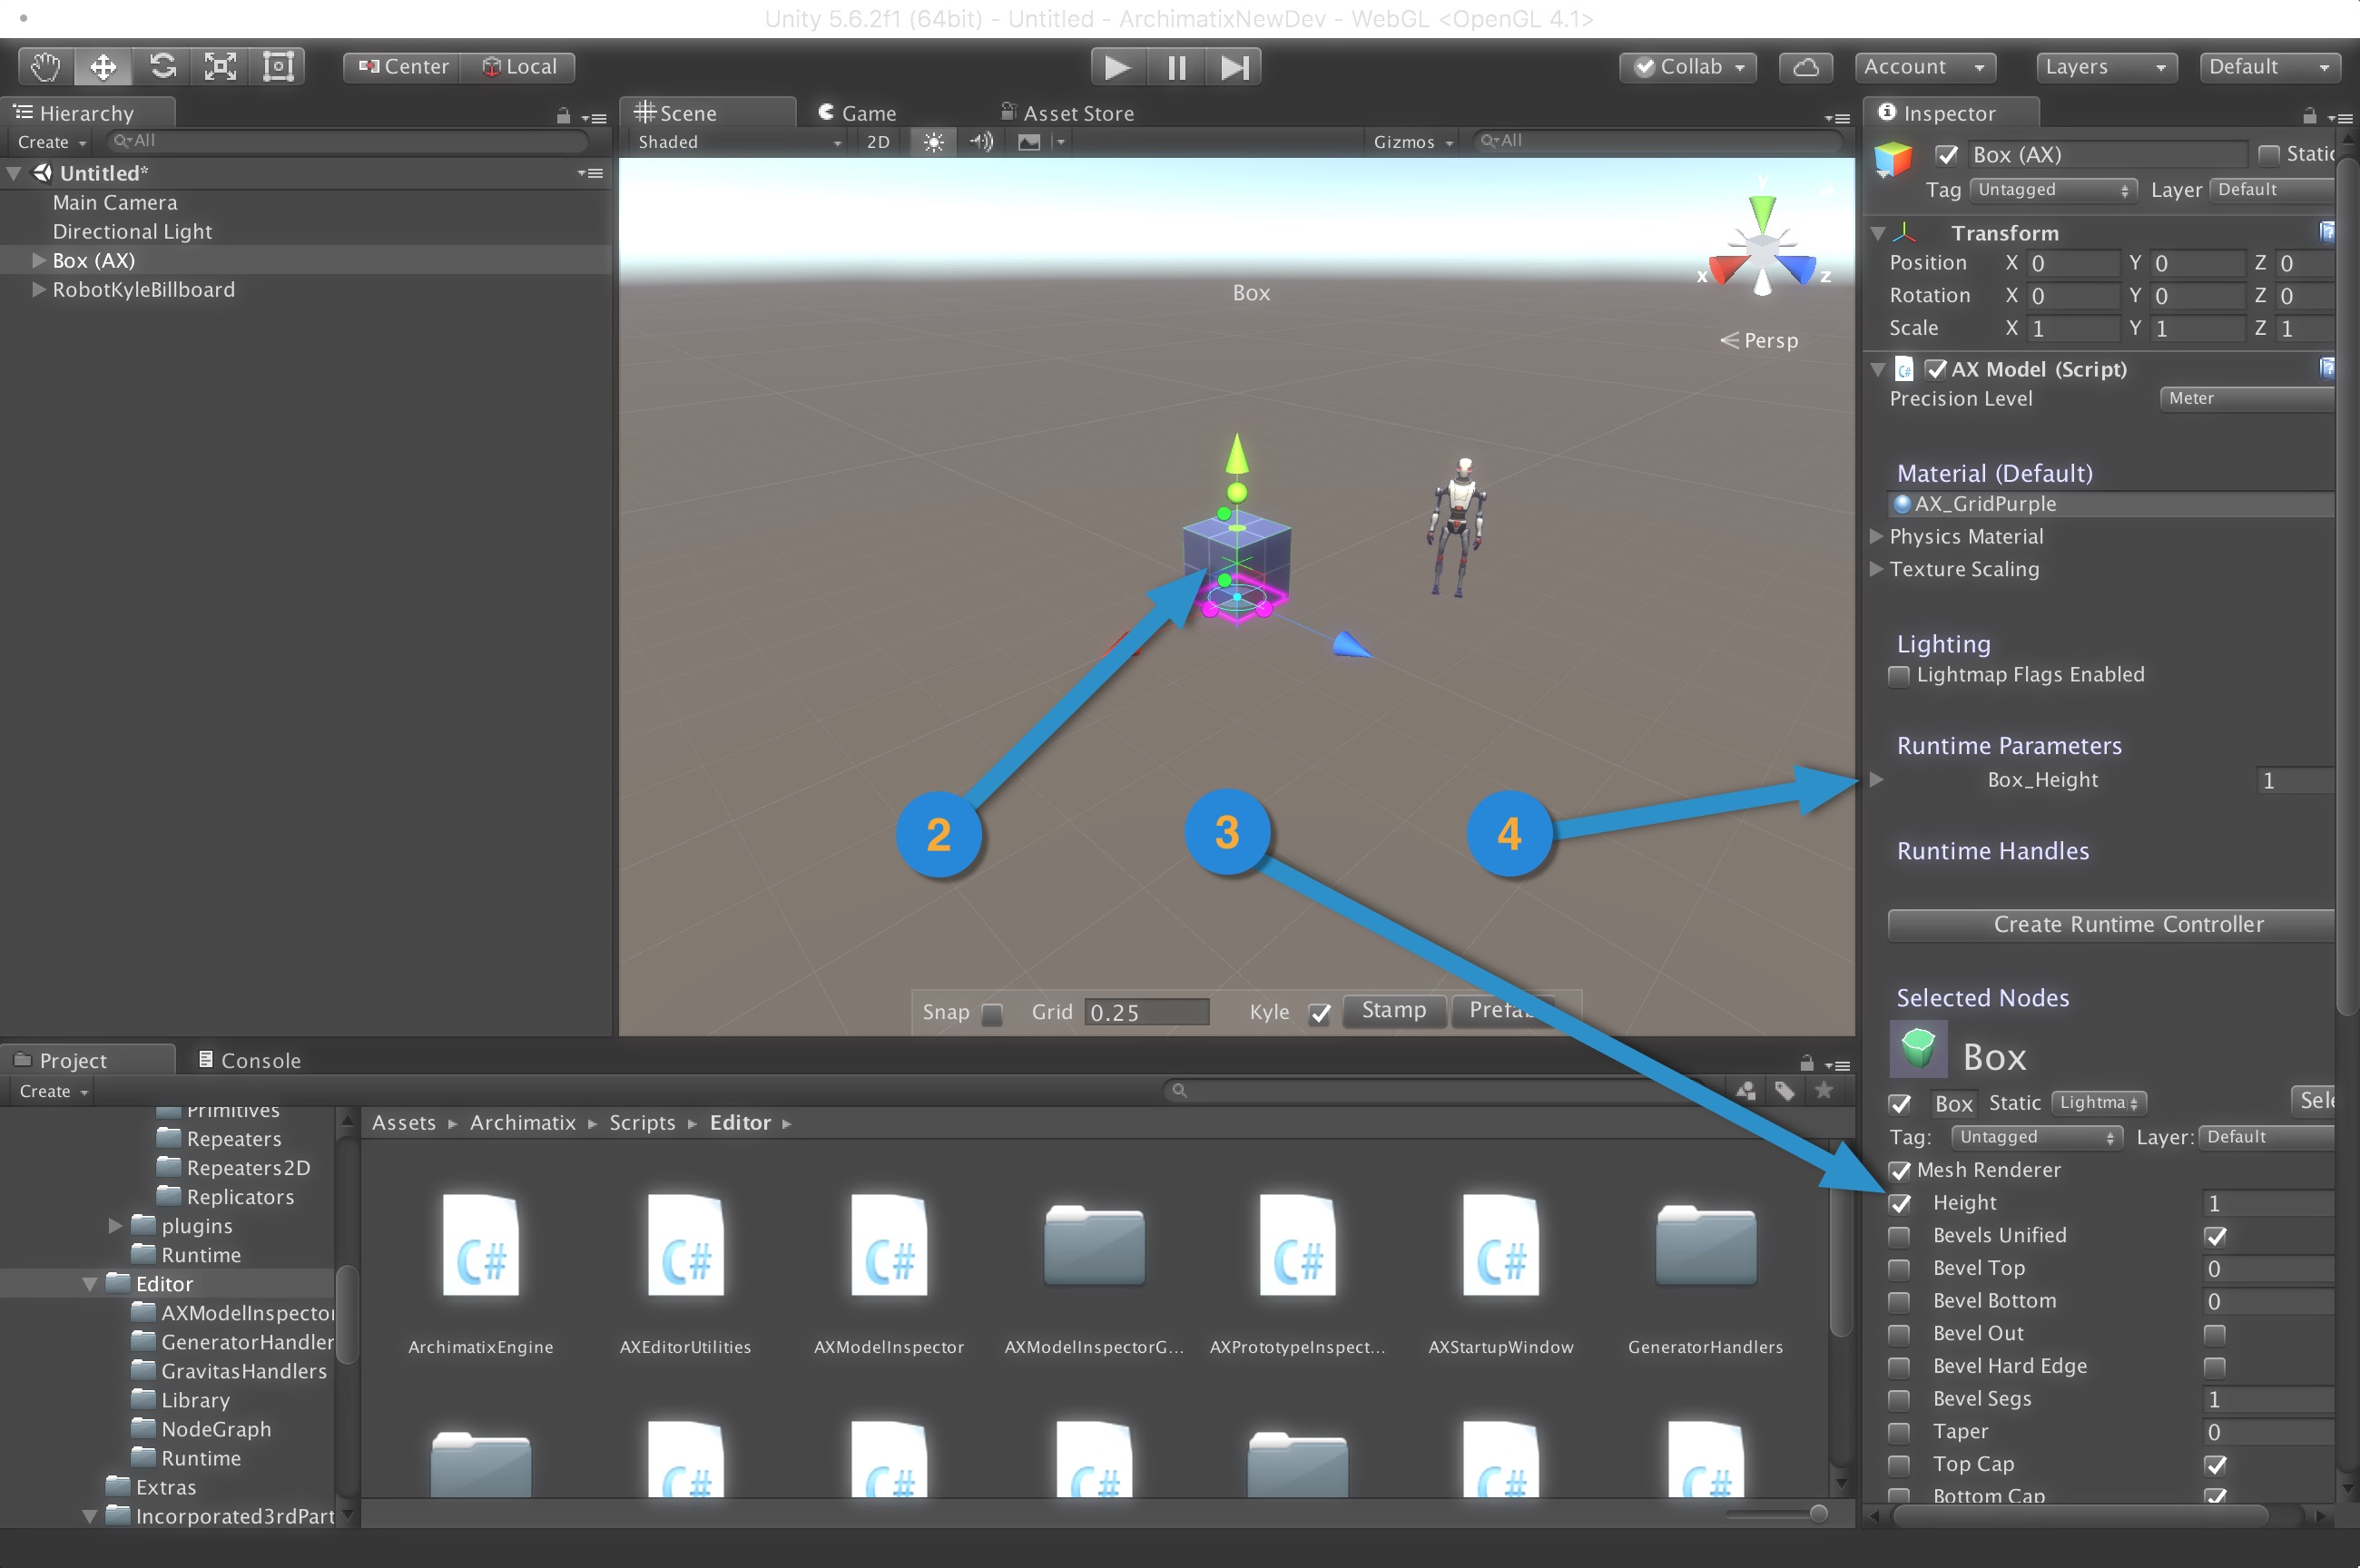
Step 2. Select the Box in the Scene.
Step 3. In the Inspector choose to expose the Height parameter as a runtime parameter by clicking the checkbox to the left of the parameter name.
Step 4. Note that the Height parameter has appeared in the list of the model’s runtime parameters.
The exposed runtime variables are easy to use in any game script, but they can also be easily made available for binding to Unity’s UI system, PlayMaker, or any other system that connects to dynamic variables. All we have to do is create an AXRuntimeController asset. Fortunately, this is done with the click of a button!
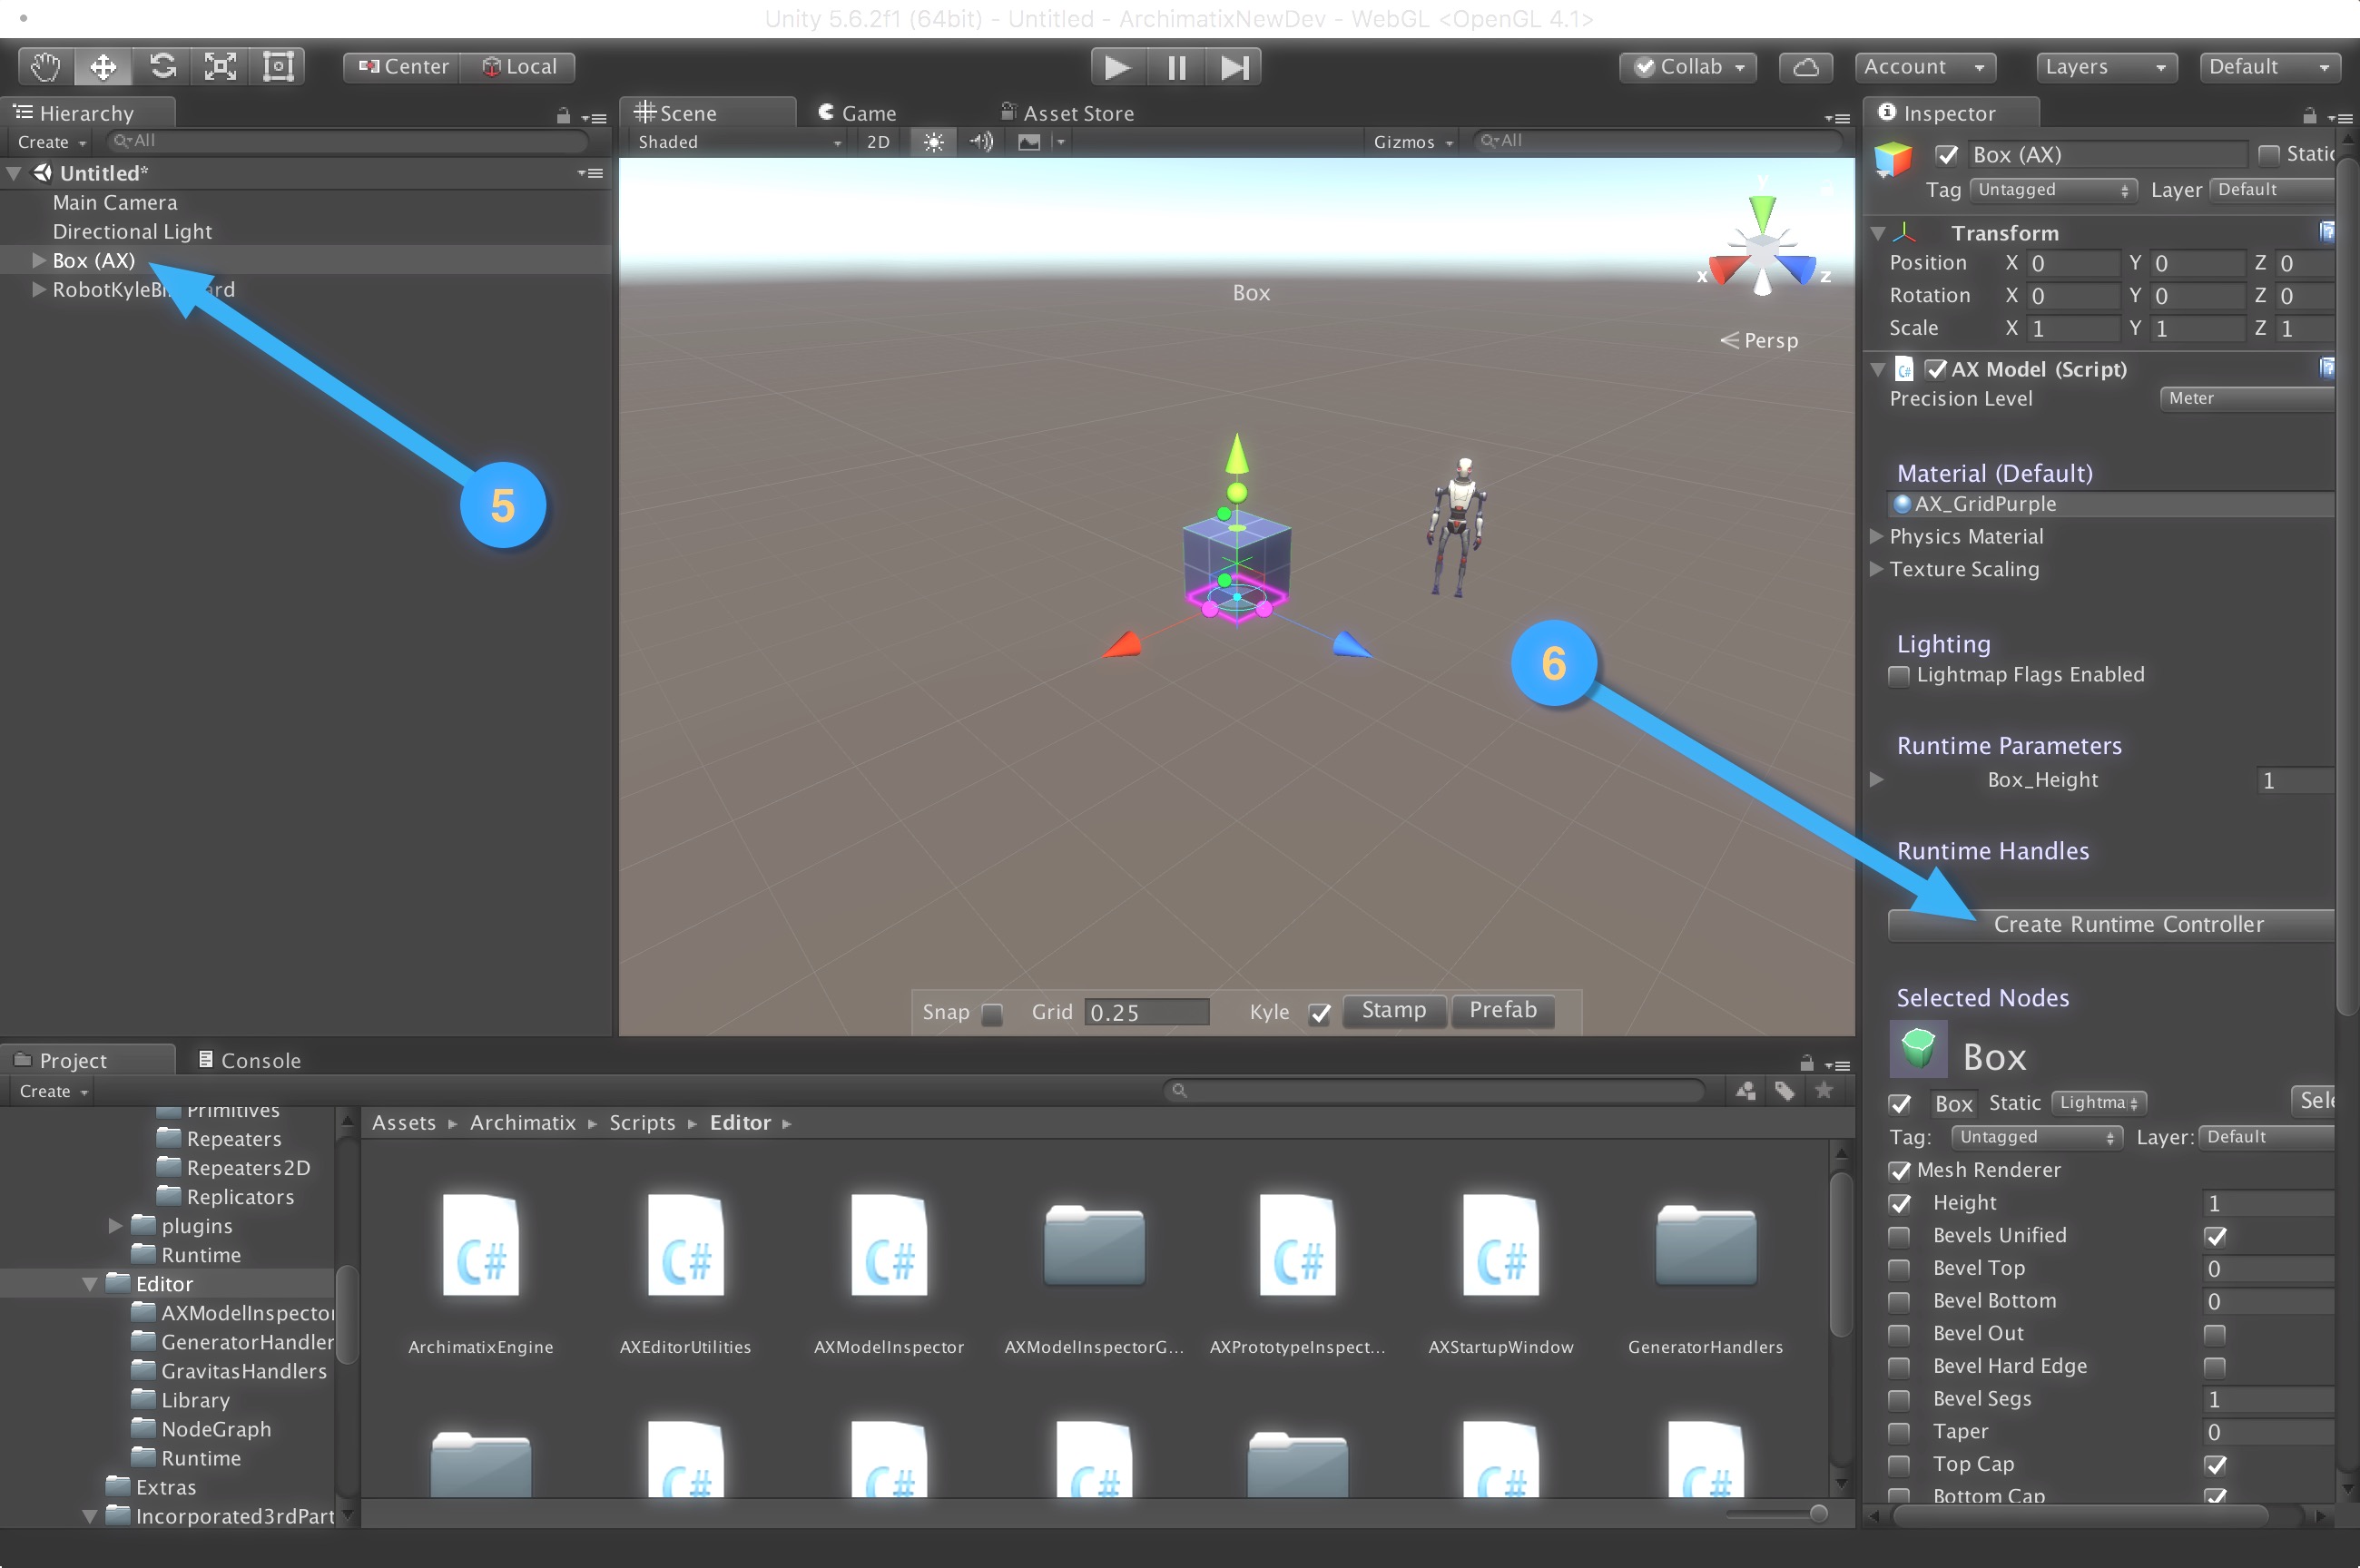
Step 5. Make sure the AXModel GameObject is selected.
Step 6. Click on the “Create Runtime Controller” button.
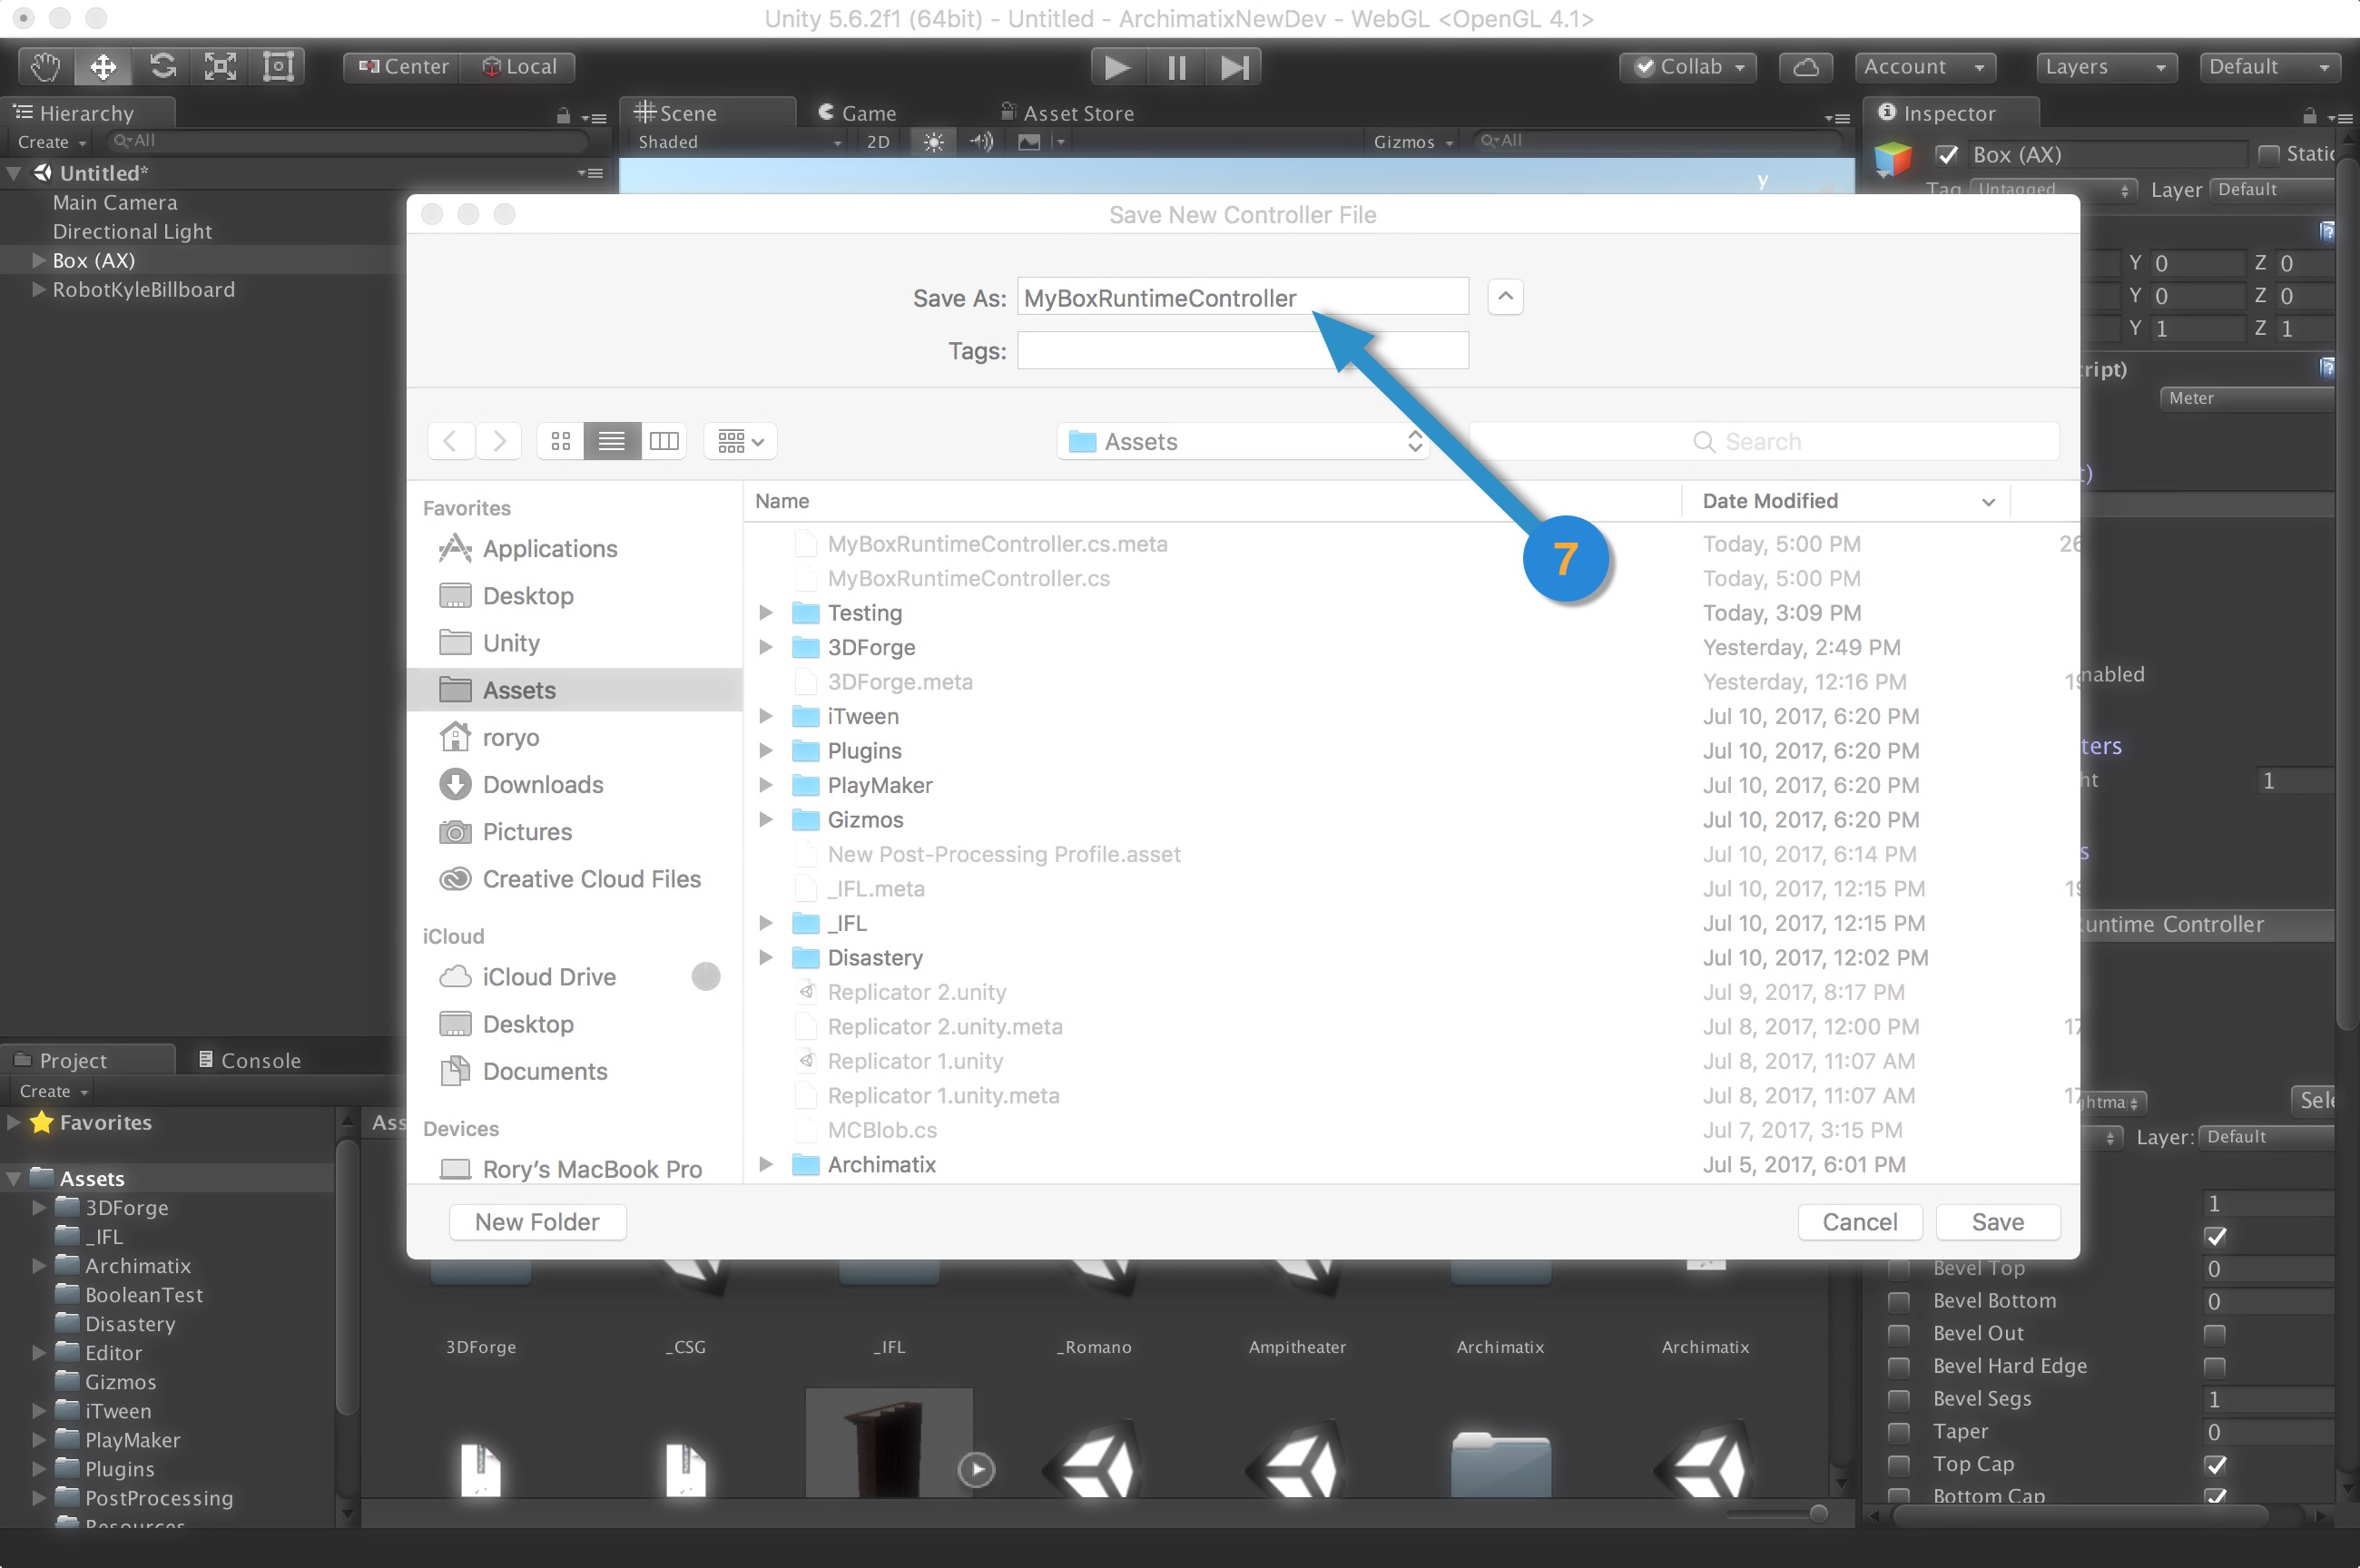
Step 7. Save the new controller file anywhere in your Asset folder.
You’ve done it!
You now have an Asset that connects to Archimatix’s runtime parameters and serves as a source for for Unity’s UI system, PlayMaker, etc. When choosing a connection, use the runtimeController asset you just created as your source of variables.
You may not have realized it, but by clicking that button, you 1. created a GameObject in the AXModel hierarchy and 2. added a new component to it, the runtimeController asset you created.
If you select other parameters in your AX model to become exposed as runtime parameters, just click the “Create Runtime Controller” button again. This time it will not ask you to locate the file, but just overwrite the one you have already created.
Now let’s take a look at how we can connect your new controller to Unity’s UI.
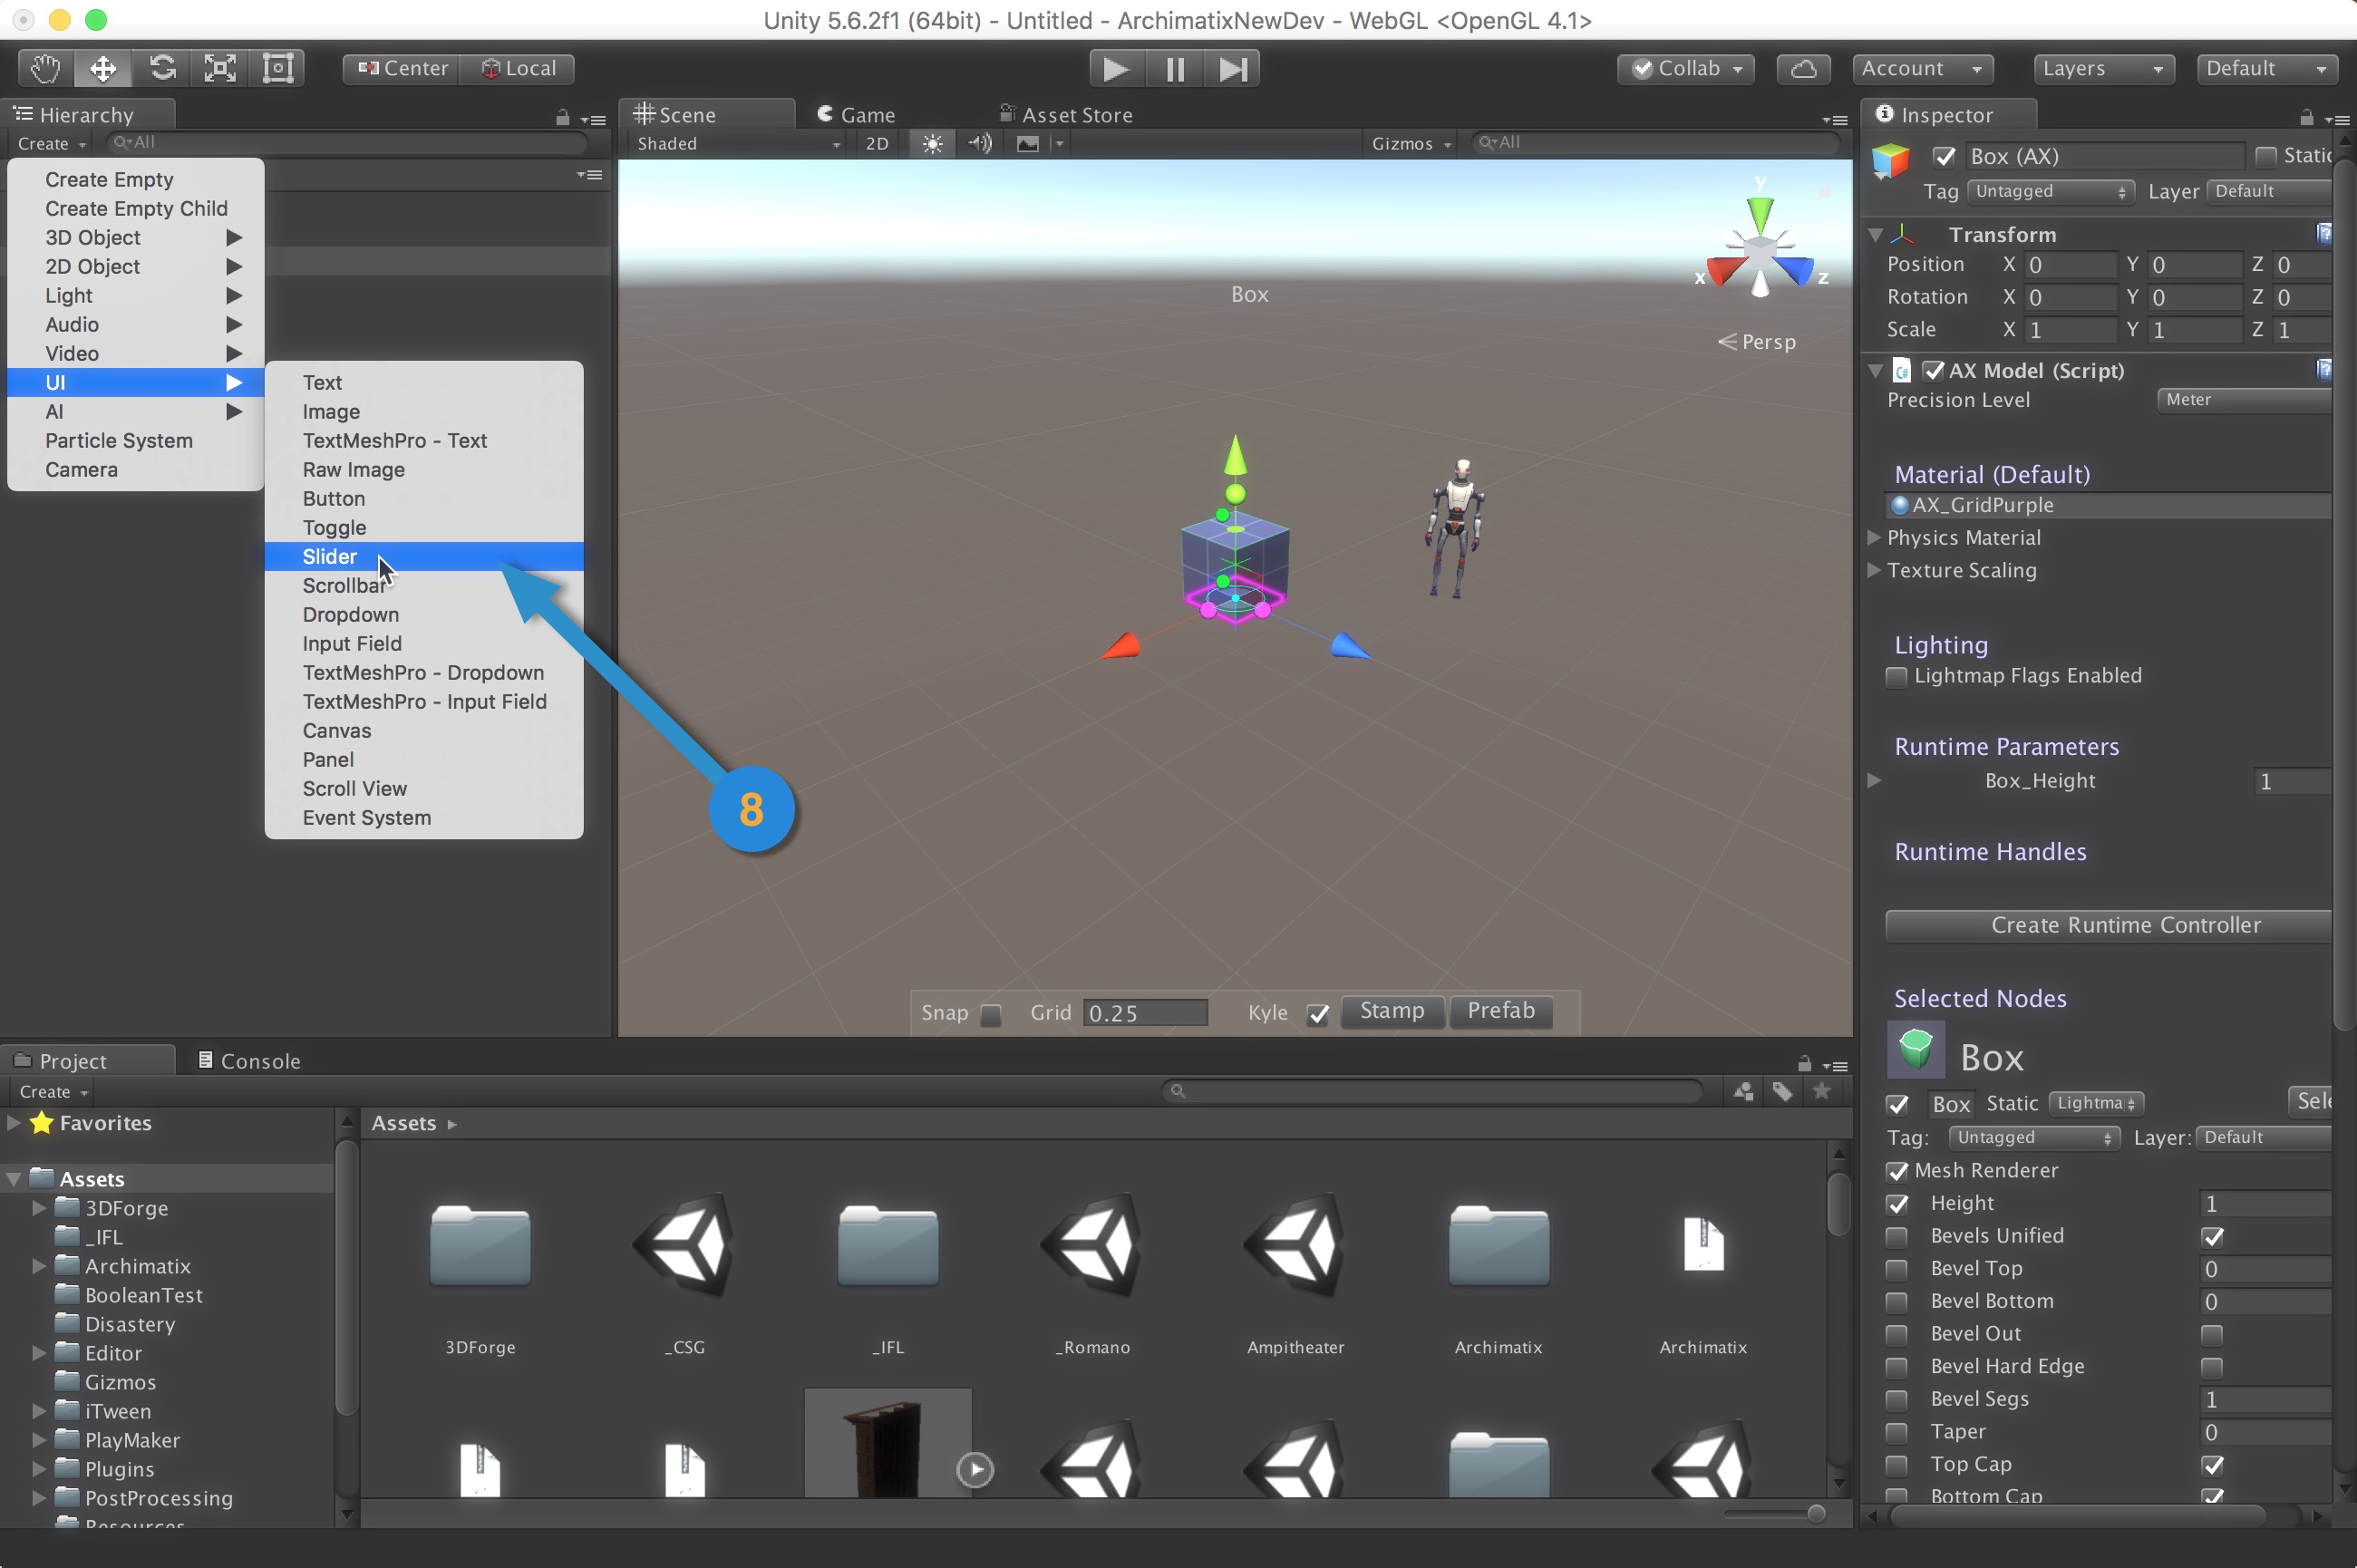
Step 8. Create a UI Slider. Adjust its Max Value to 10.
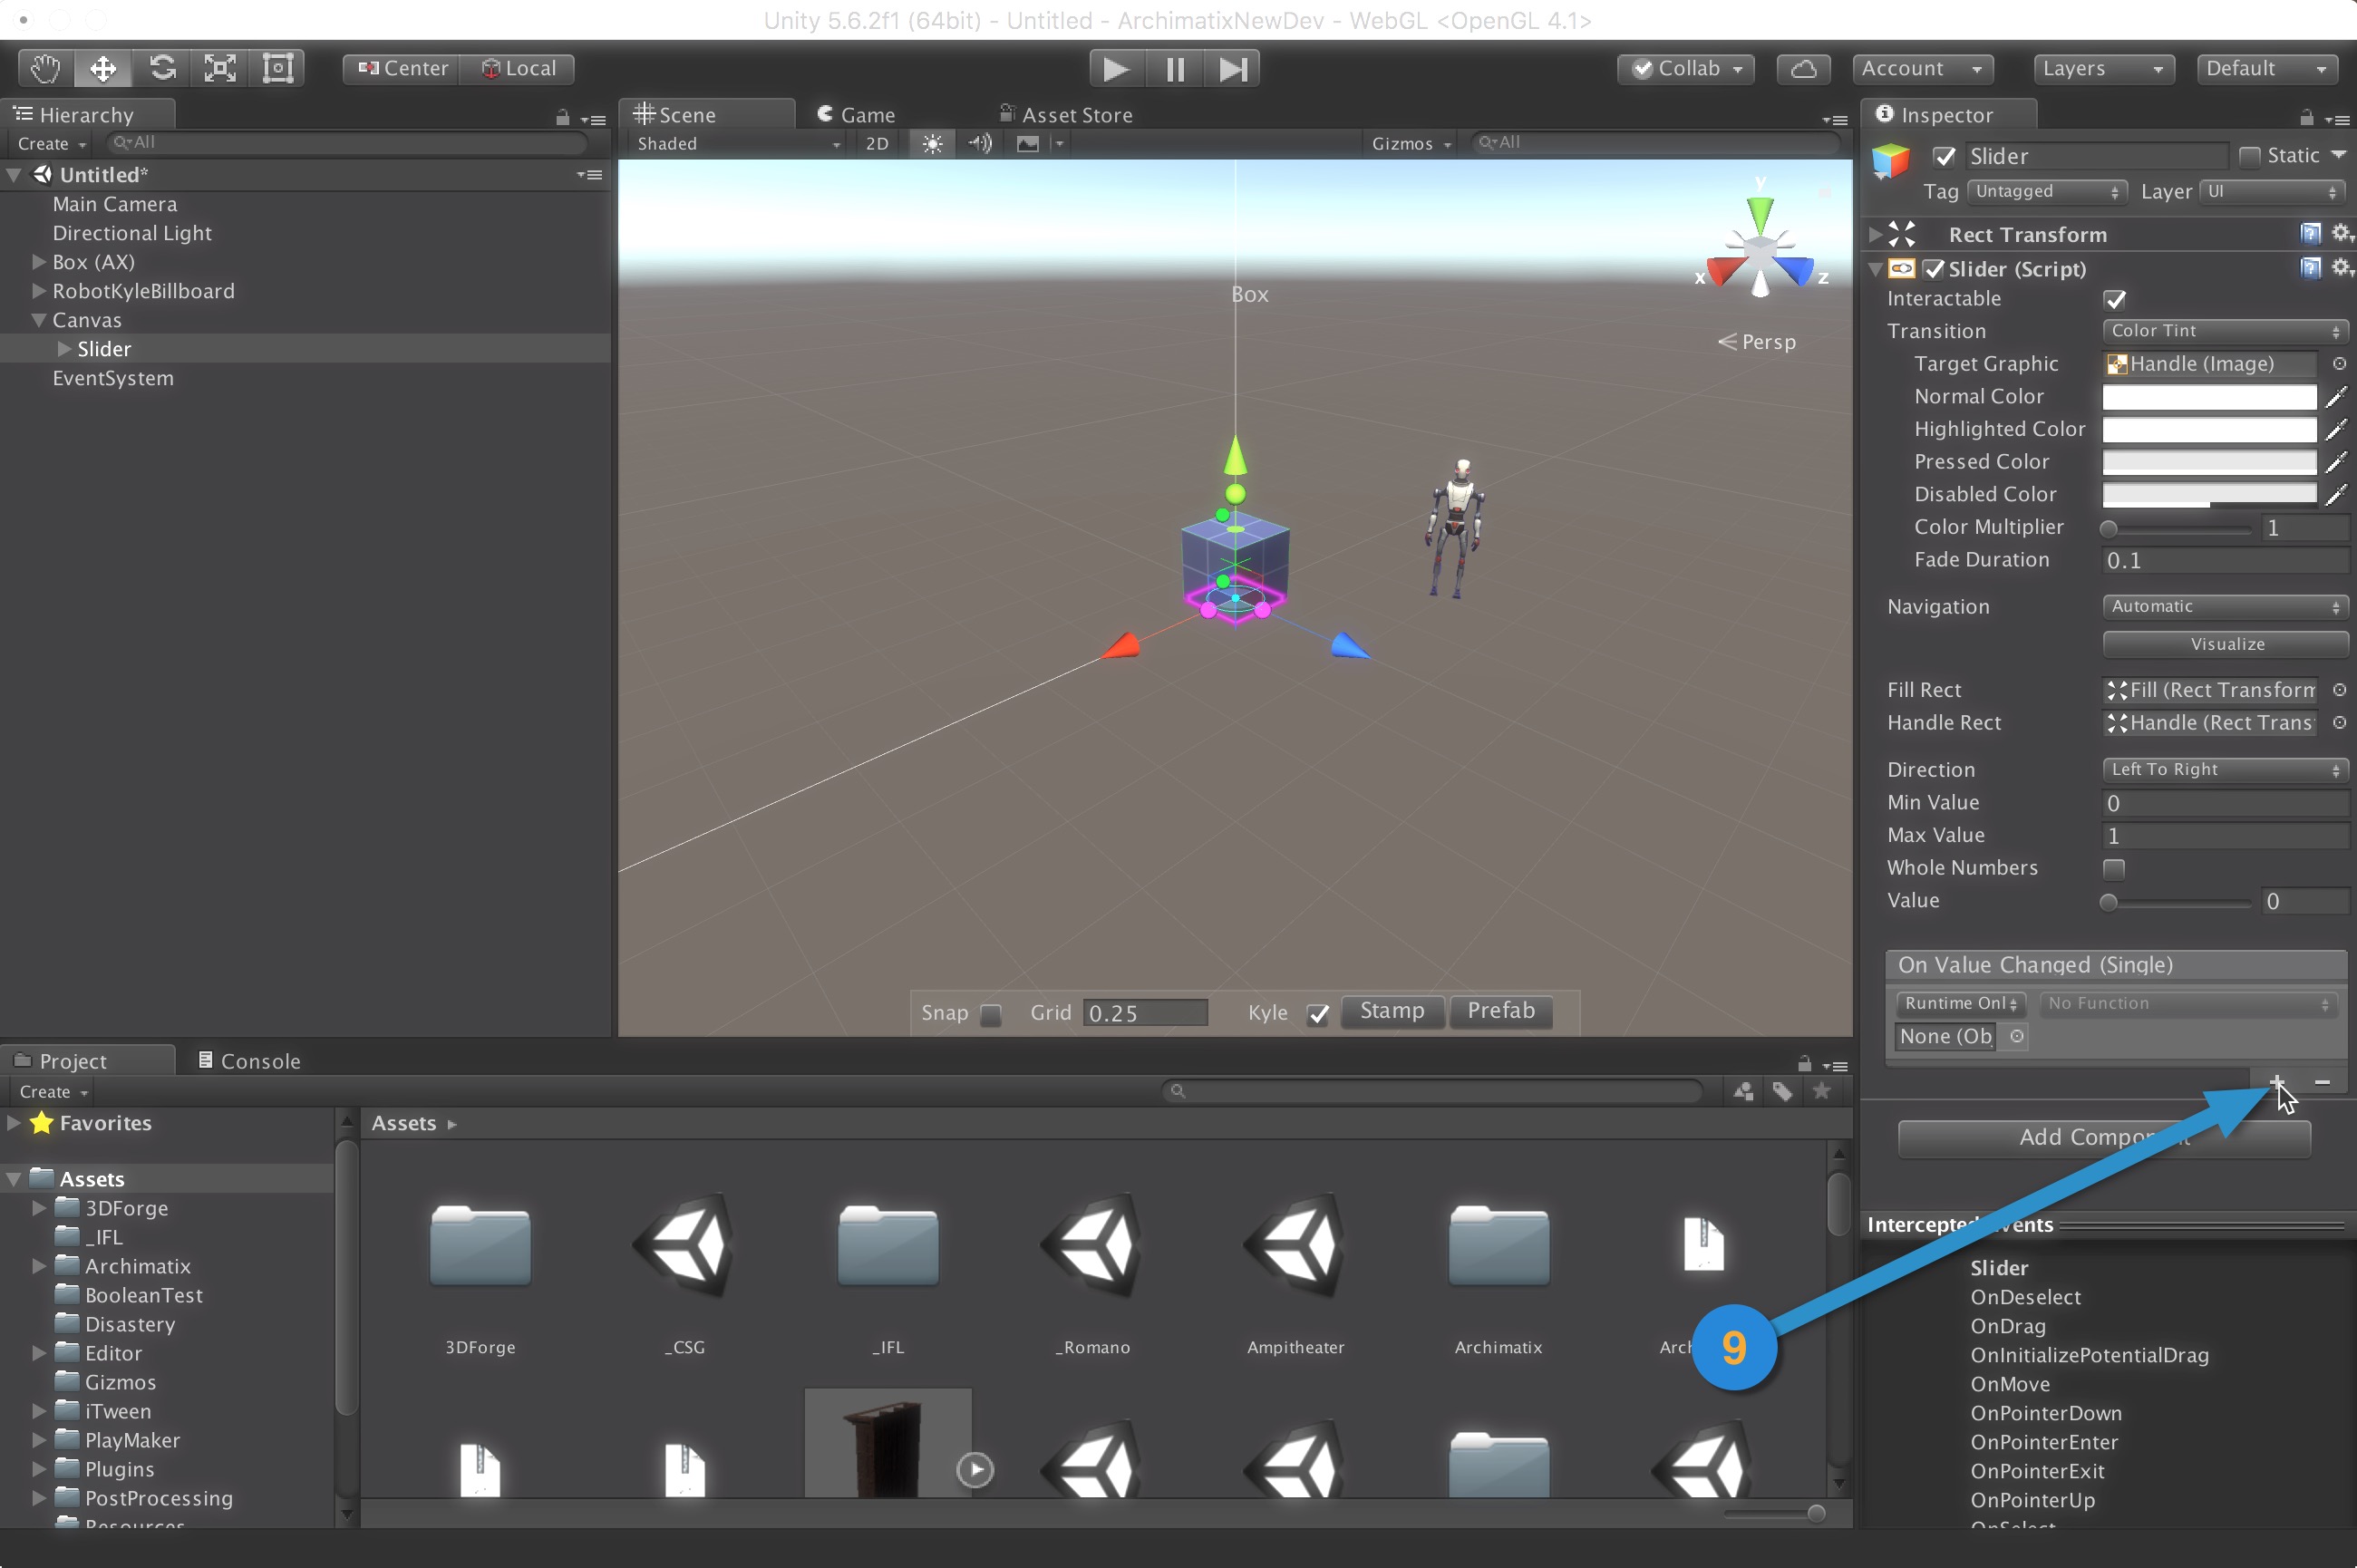
Step 9. Add an Action to the Slider.
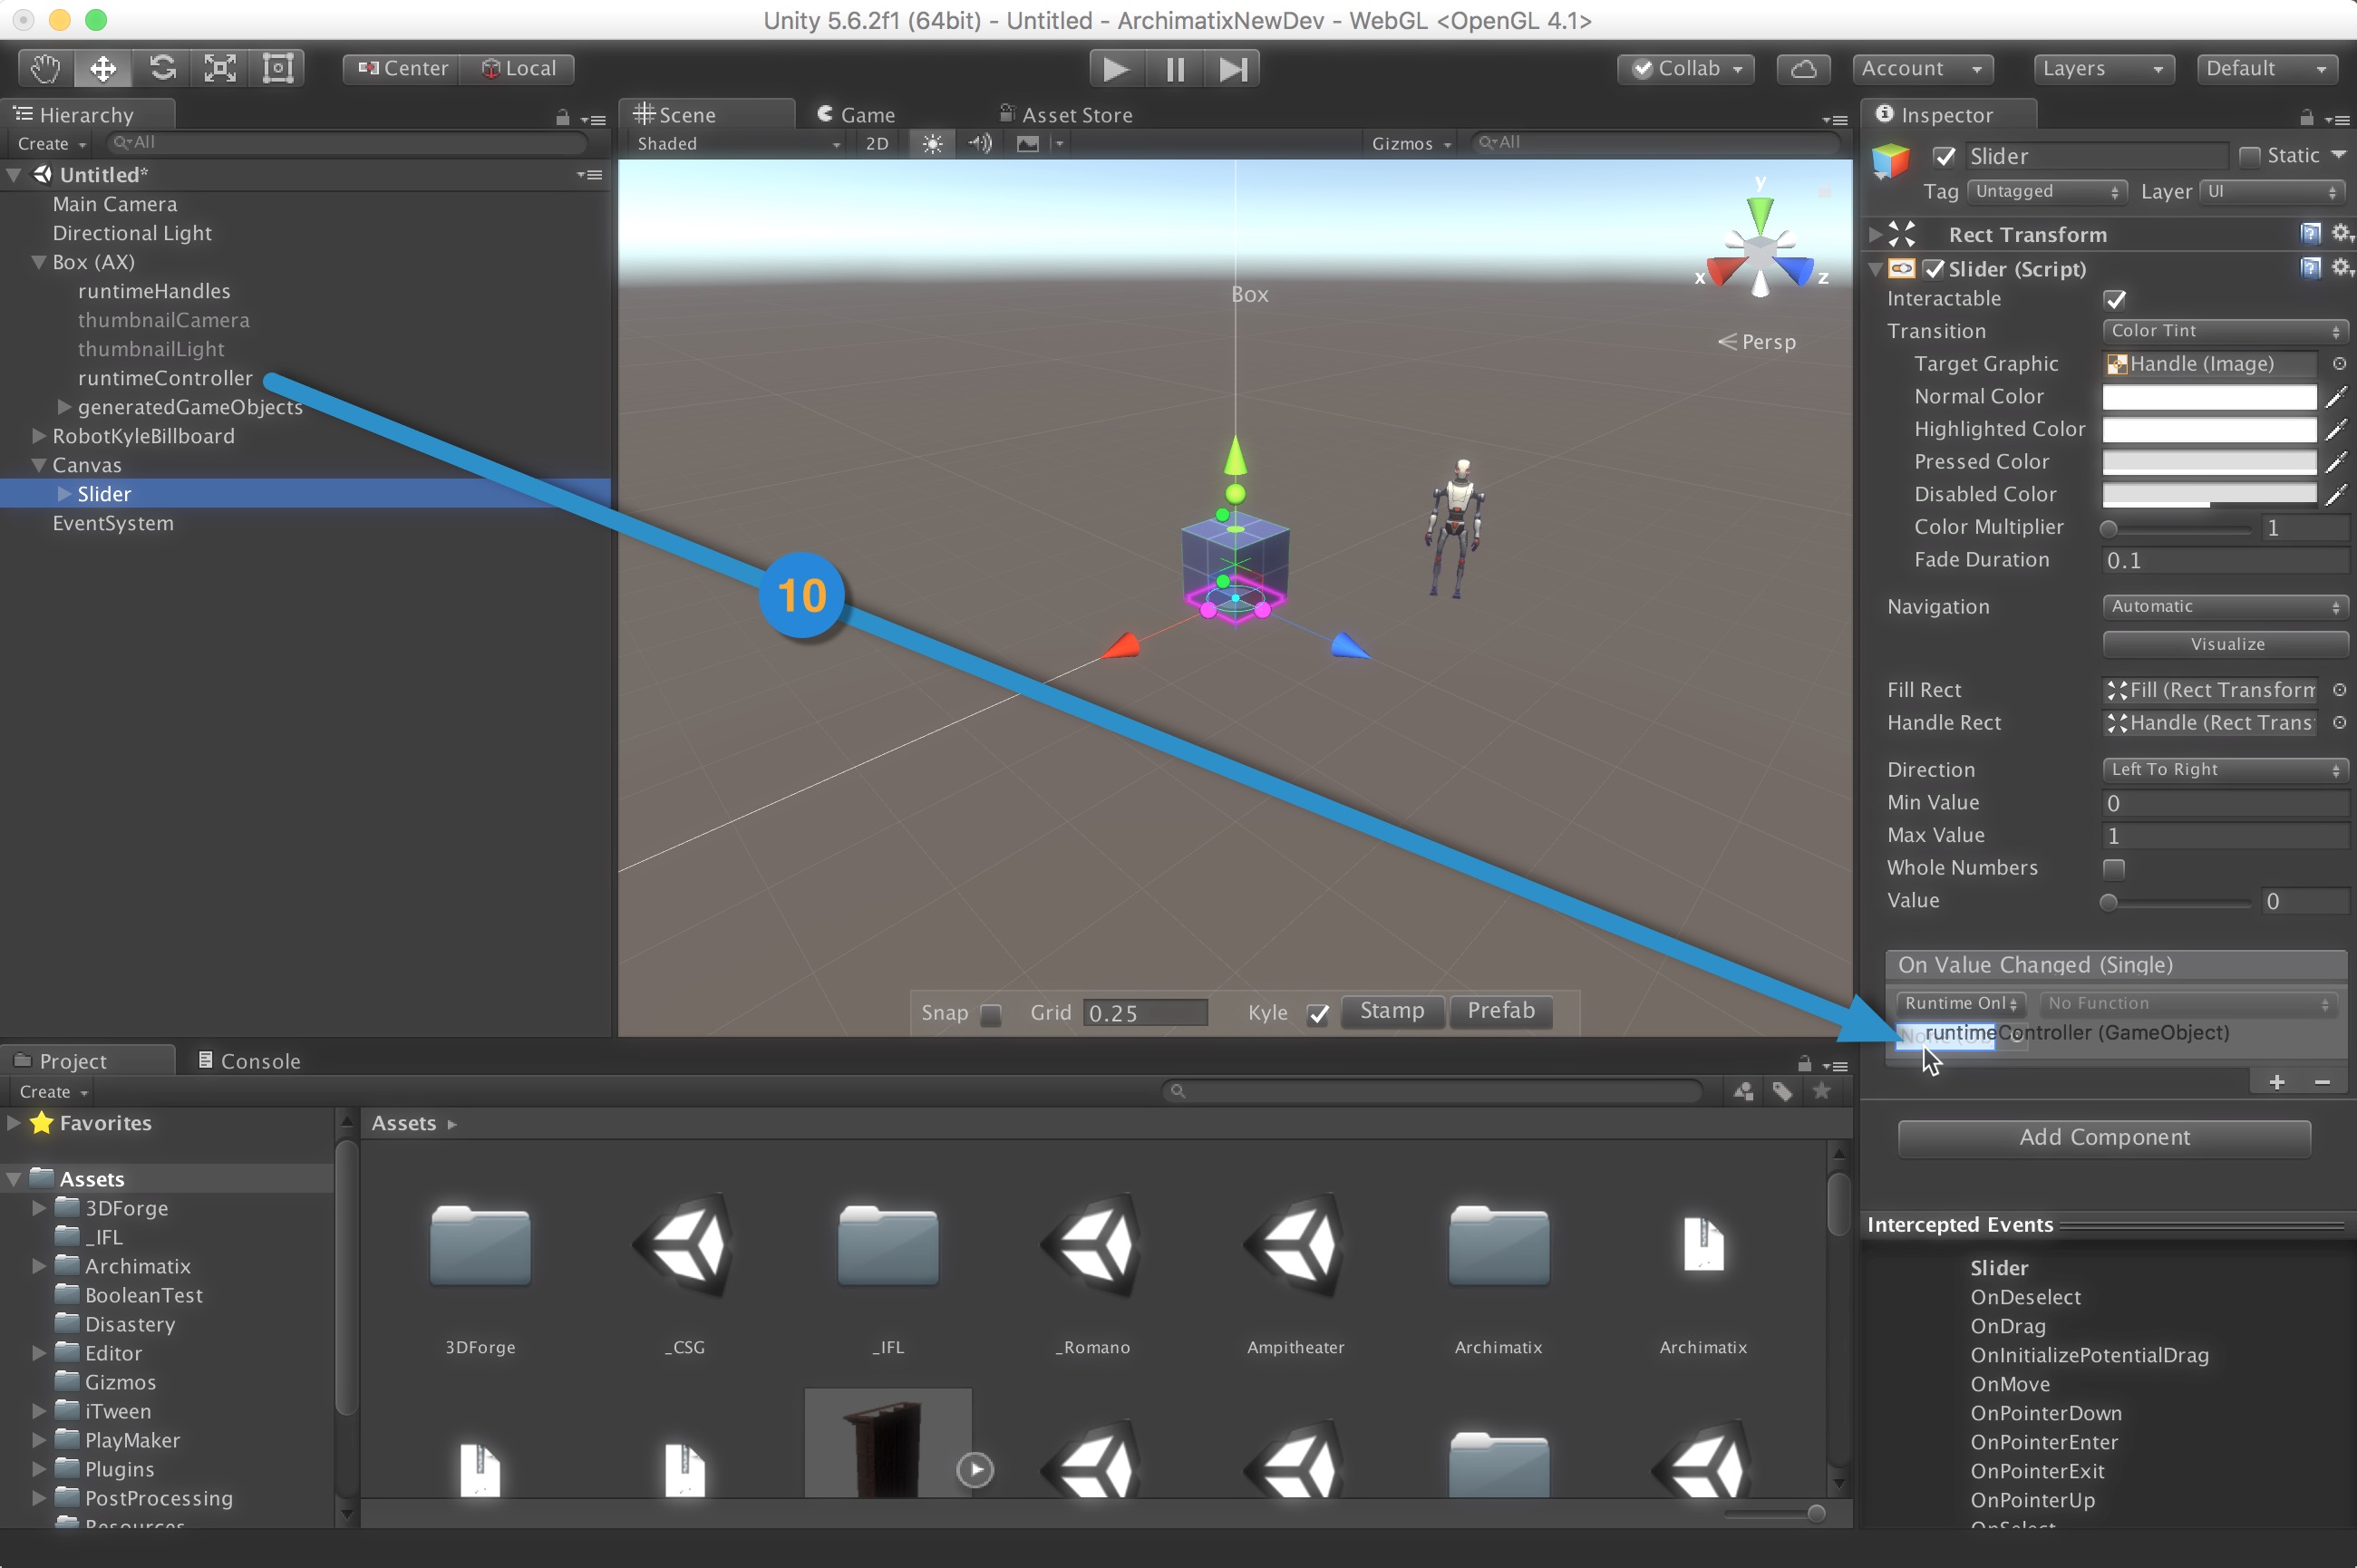
Step 10. Unfold the Box model, click on the Slider in the Hierarchy and drag the runtimeController to the ObjectField in the Slider Inspector.
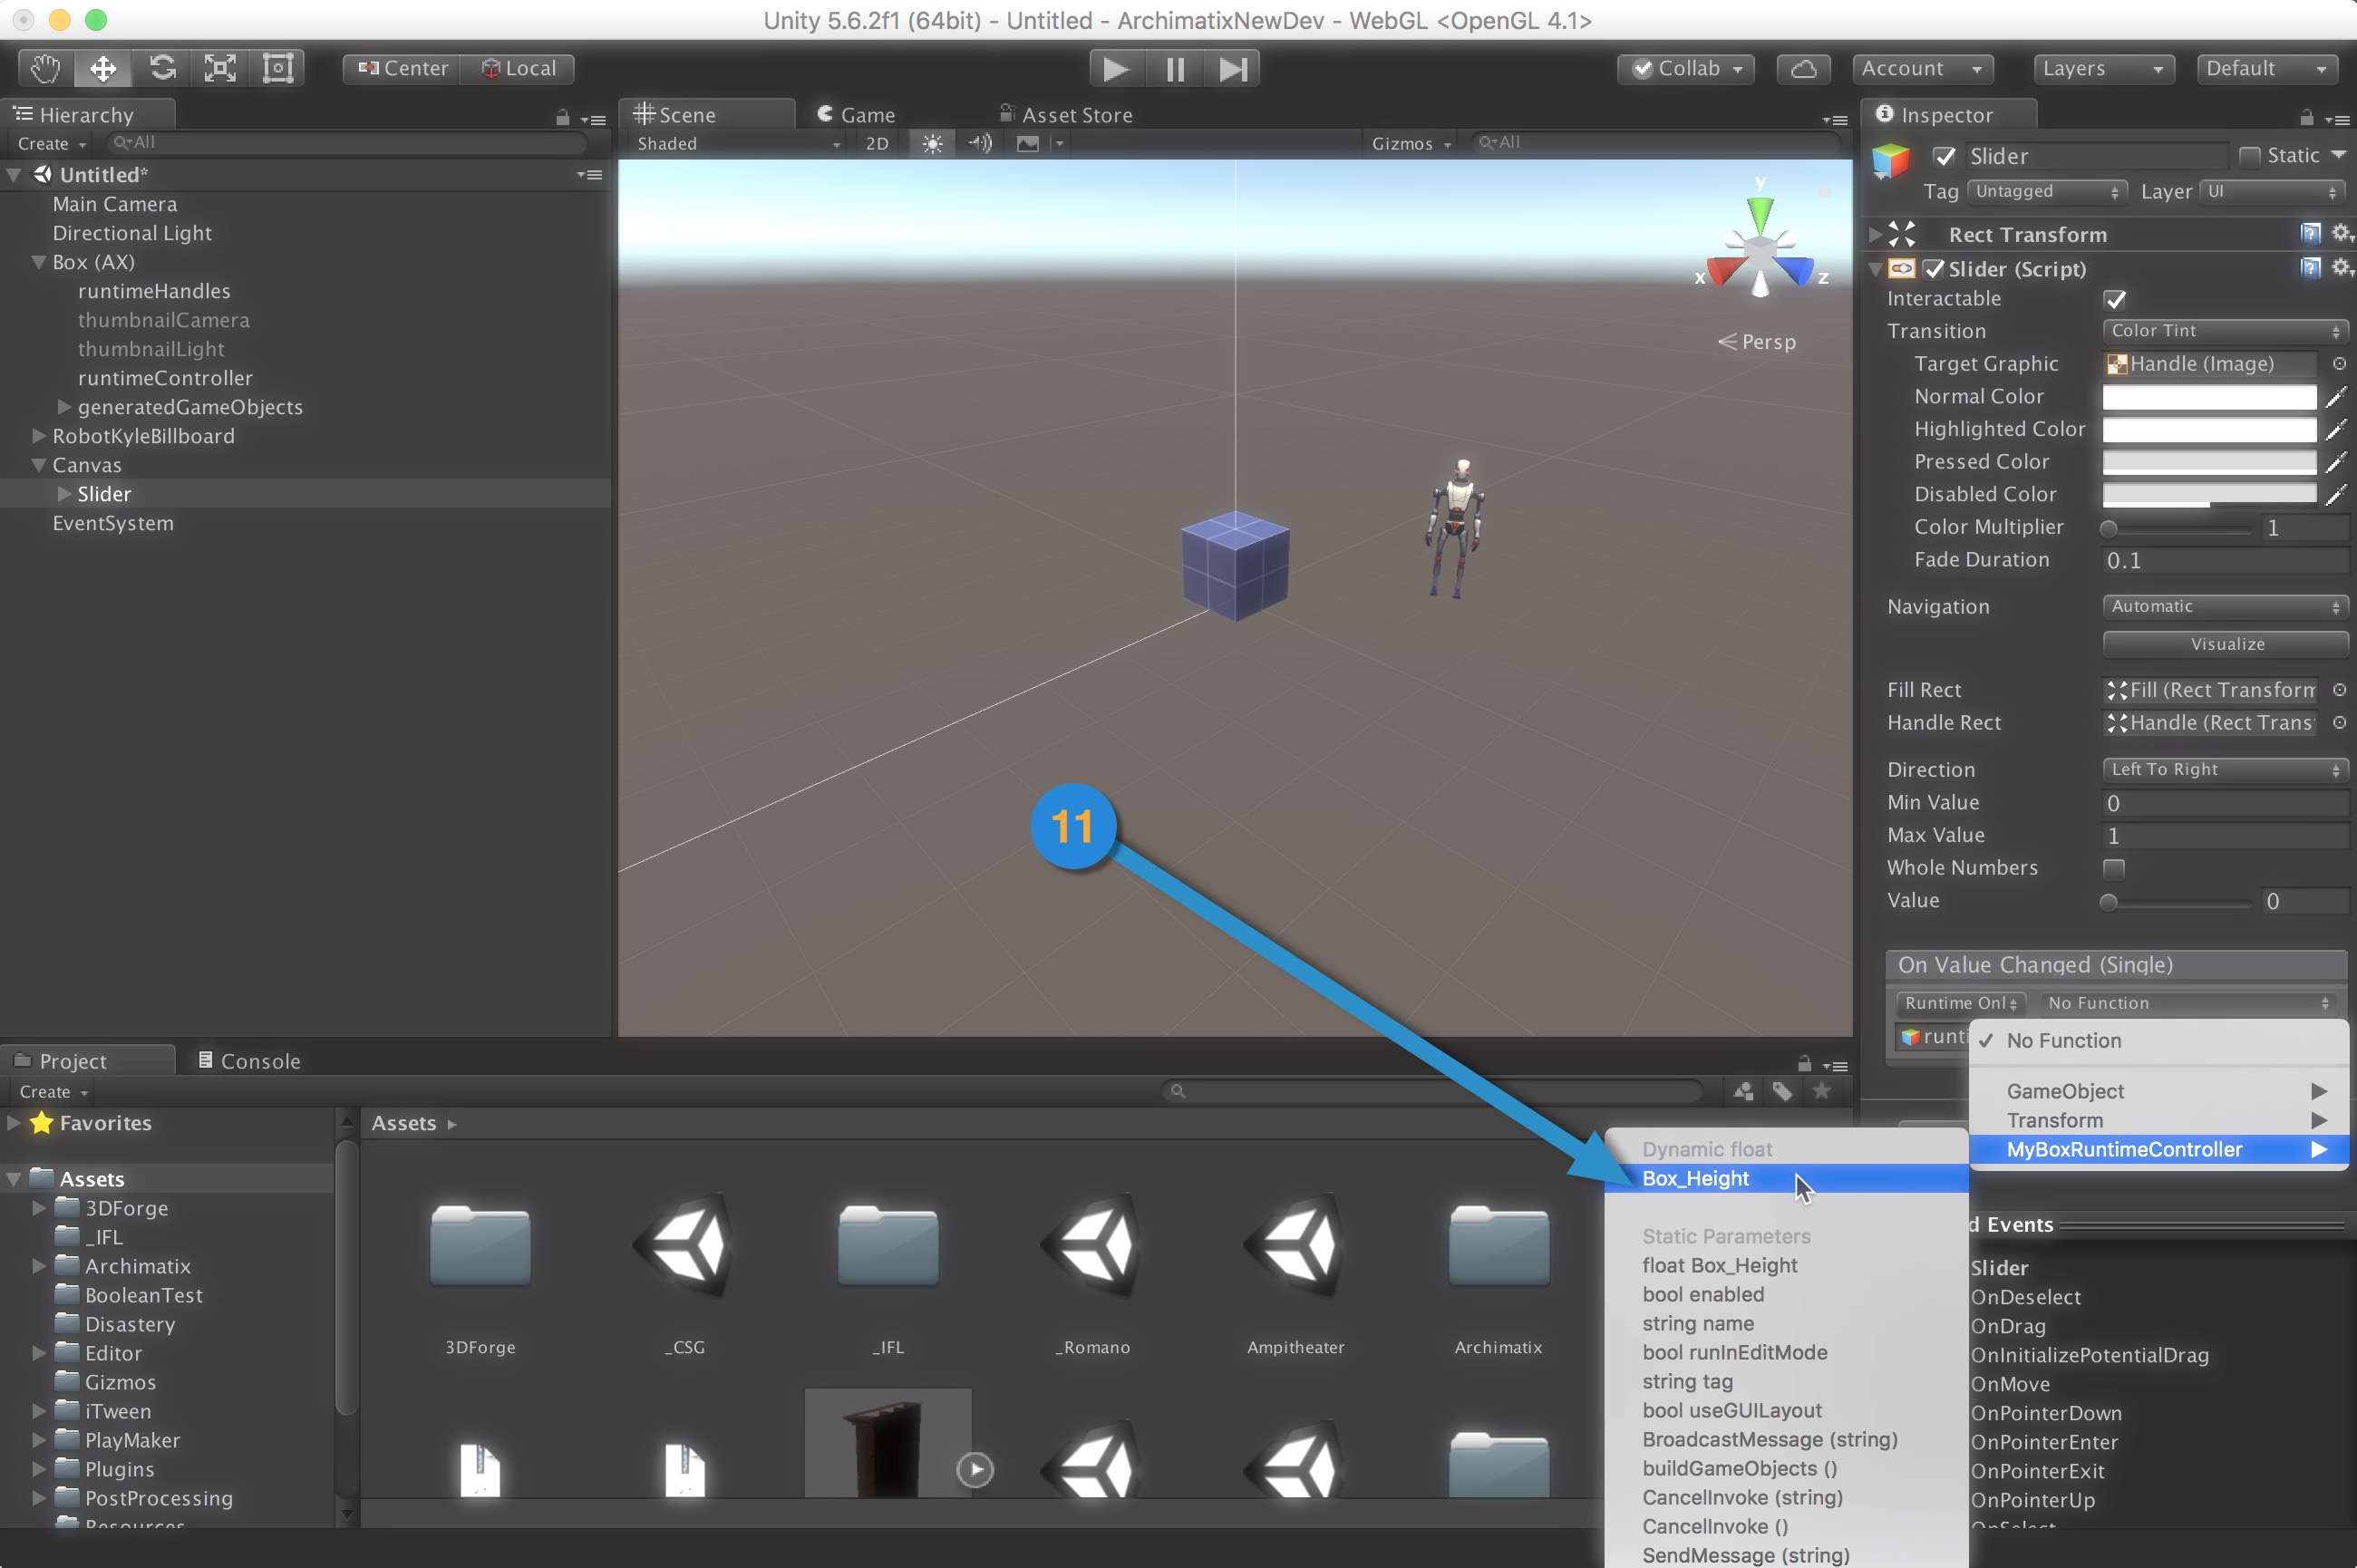
Step 11. For the Function pulldown in the Slider Inspector, choose your controller and the Box_Height variable.
By Jove! You’ve done it again!
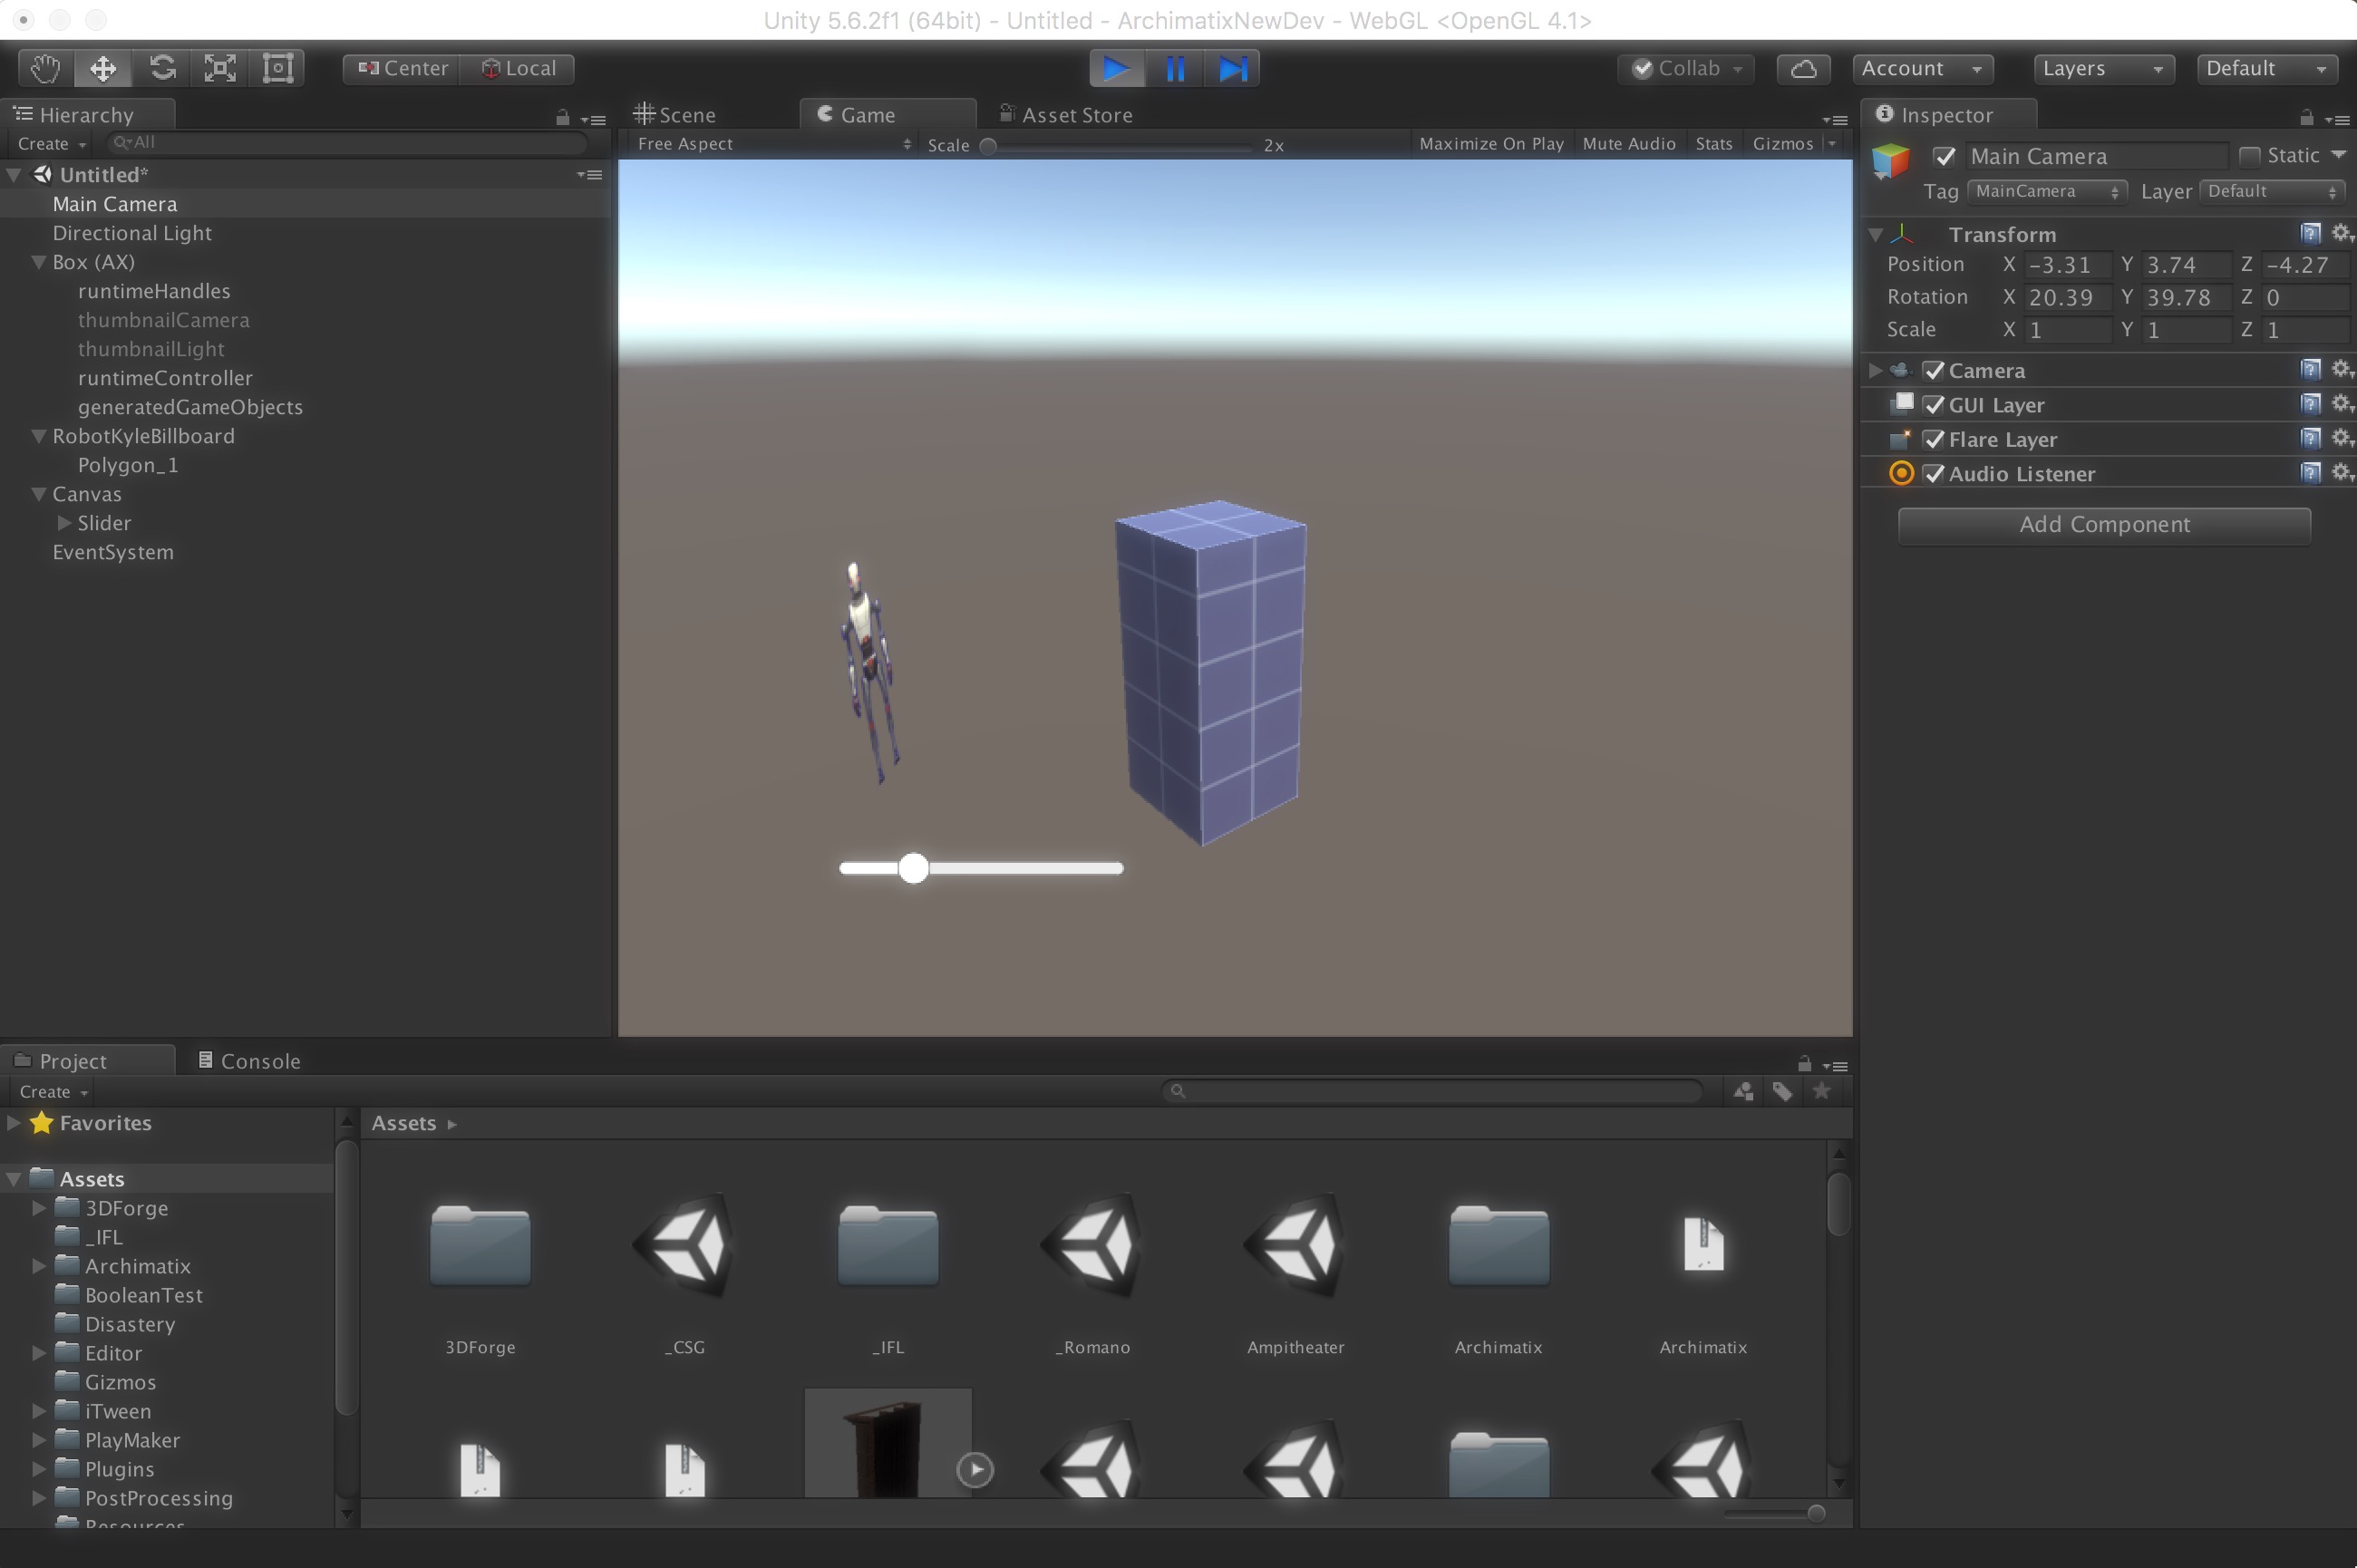
You have just empowered your game interface to do runtime modeling! Check it out!
Step 12. Check your UI to make sure the Slider is visible in the Game View. Click Play and manipulate the Slider. The Box height should be adjusting as you move the Slider.


Leave a Reply
You must be logged in to post a comment.